3D Origami: Introduction
3D Origami: Part 1 – Fold the Component Pieces
3D Origami: Part 2 – Make a Ring Base
3D Origami: Part 3 – Coming Soon!
3D ORIGAMI: PART 2 – CREATE THE RING BASE
Now that you have made a large pile of triangular component pieces (see “Part 1: Fold the Component Pieces“), we can start to build a ring base! A ring base is a versatile foundation for any 3D origami creation. On the left is a ring base alone; on the right is a ring base as the foundation of a 3D origami swan.
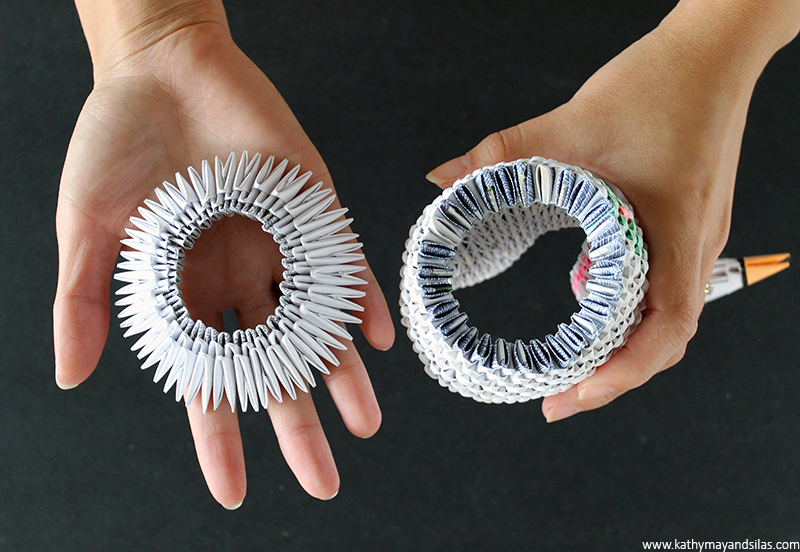
In this tutorial, we will make a ring base of 30 component pieces. Please note that you may alter the number of component pieces in your ring base to make larger or smaller 3D origami creations. Shall we begin?
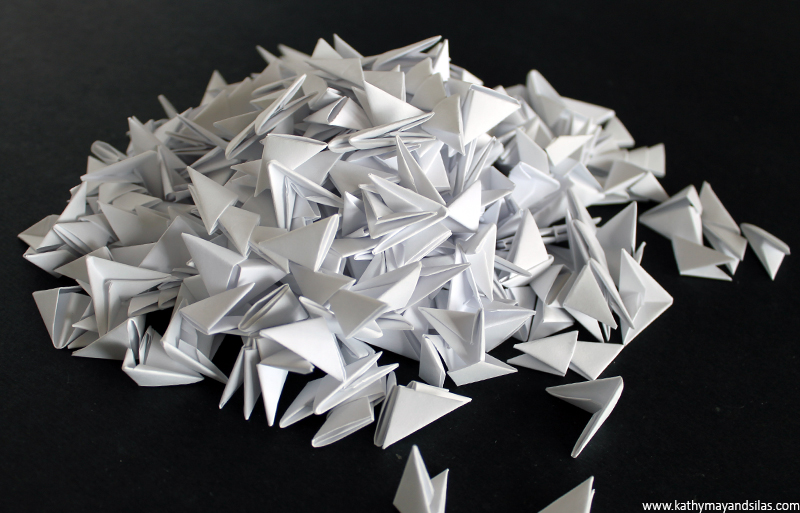
1. First, make sure you have a sufficient number of component pieces. For a ring base of 30, you will require 60 component pieces for the base itself. Of course, you should make extra for the rest of your origami sculpture.
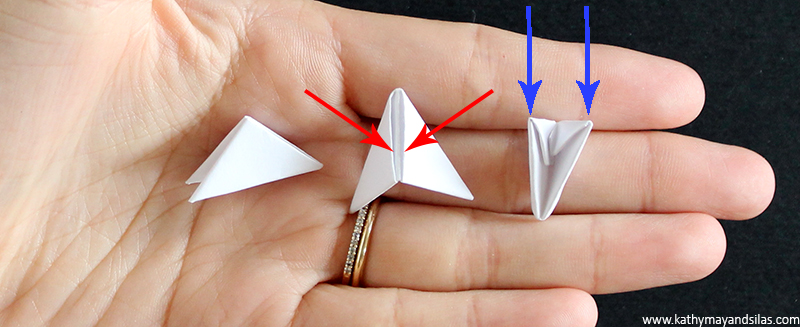
2. Note that each component piece is a right triangle. One leg of the right triangle has two “pockets” (red arrows) while the other leg has two “wings” (blue arrows).
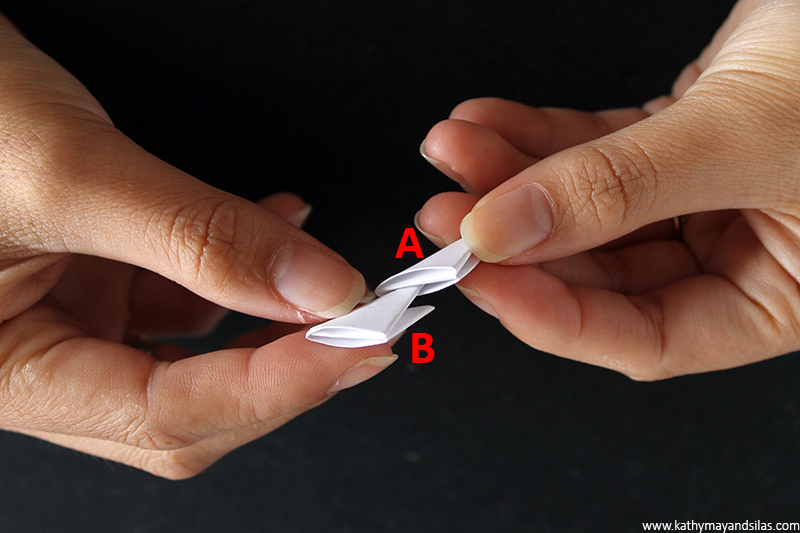
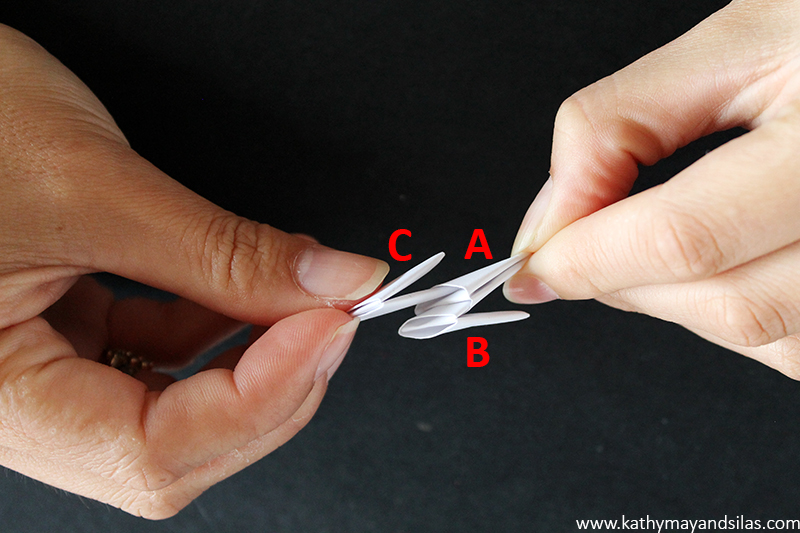
3. Insert the left wing of one component piece (B) into the right pocket of another component piece (A). Make sure that the component pieces are facing the same direction (i.e., that the right triangle component pieces are parallel).
4. Then insert the right wing of a new component piece (C) into the other pocket (A).
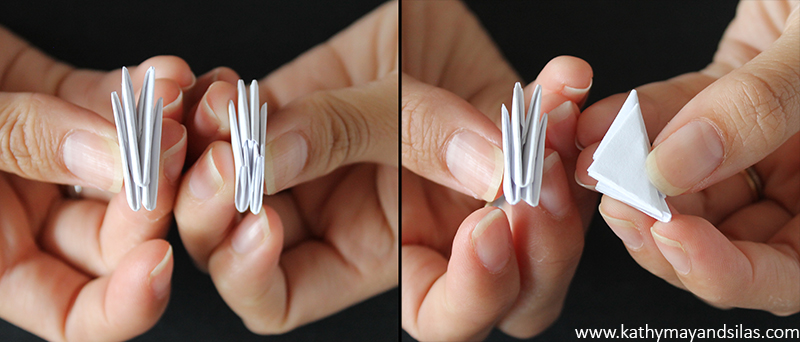
Here’s what your 3-component-piece unit should look like from the front and back, front and side.
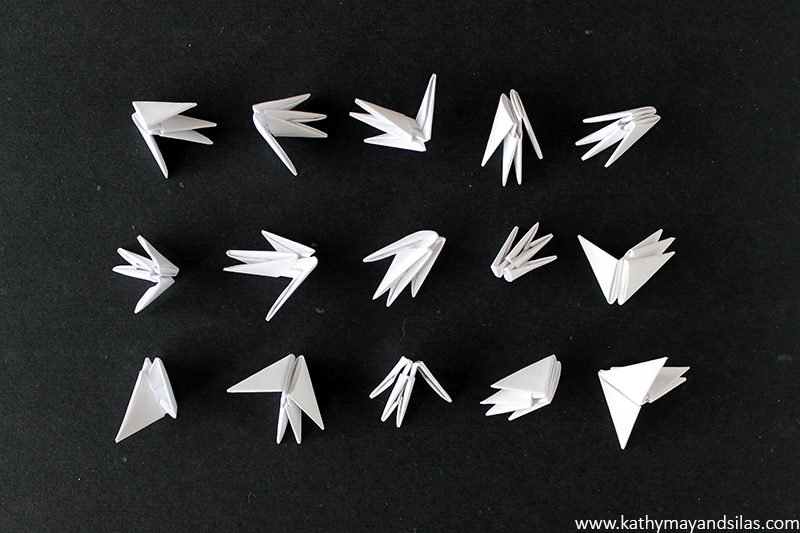
5. Repeat Steps 3 and 4 with new component pieces until you have 15 sets of 3-component-piece units.
6. Hold 2 sets of your 3-component-piece units (E & F) side-by-side. Take a new component piece (D) to join these 2 sets together. The right-most wing of E should go into the left pocket of D; the left-most wing of F should go into the right pocket of D.
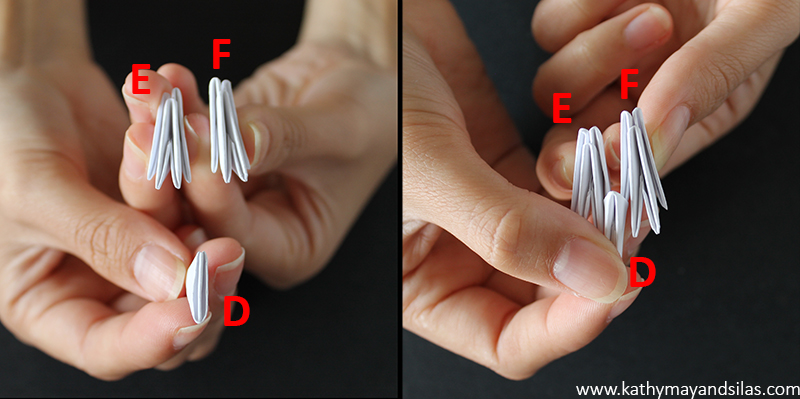
Now you have created a 7-component-piece unit. Here’s what it should look like from the front and back.
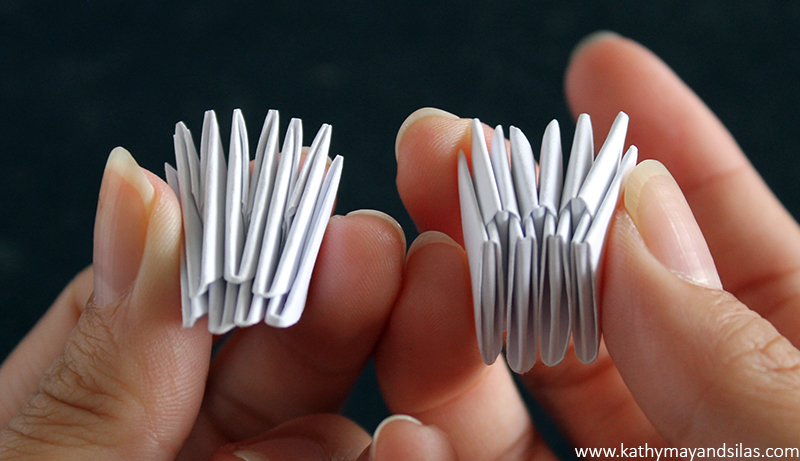
7. Repeat Step 5 until you have 7 sets of 7-component-piece units. Since we have an odd number, the 8th set will be a 3-component-piece-unit, which I’m holding in the picture.
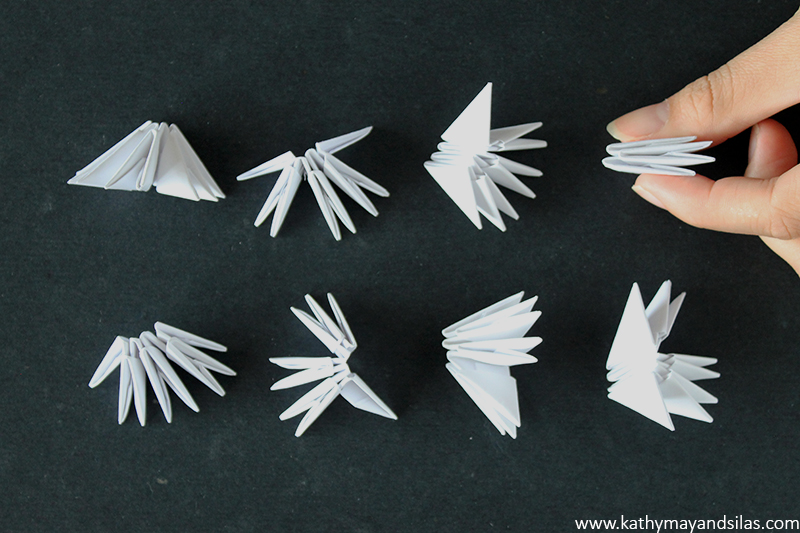
8. Hold 2 sets of 7-component-piece units side-by-side. Take a new single component piece to join these 2 units together. This is analagous to the previous step – you’ve got the hang of it! We are assembling these in smaller units because assembling a long chain becomes unwieldy!

9. Continue joining sets until you’ve made a semicircle. Make this a complete circle by using your final single component piece to join together the wings on either side of the semicircle.
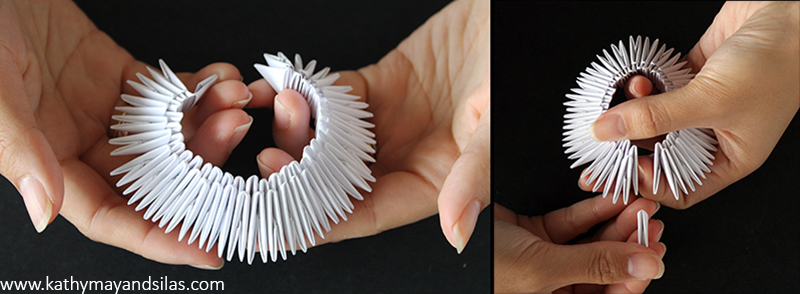
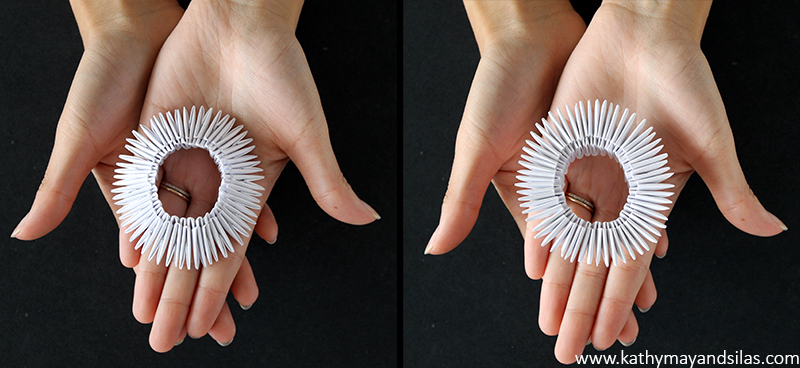
10. There you have it – you’re done! You’ve made a ring base of 30. It should feel sturdy at this point, not requiring glue. You can tighten it (but not too much, please) by pushing the outer layer into the inner layer of component pieces. As we add more layers later, the structure will be further strengthened. Here is a view of the top and bottom of your completed ring base.
The entire process of modular origami is very simple once you have learned the basics. Here are a couple of images to help with troubleshooting. If you have any questions, please leave me a comment below and I’ll be happy to help!
Troubleshooting #1: Make sure that the correct wing of your component piece goes into the correct pocket of another component piece.
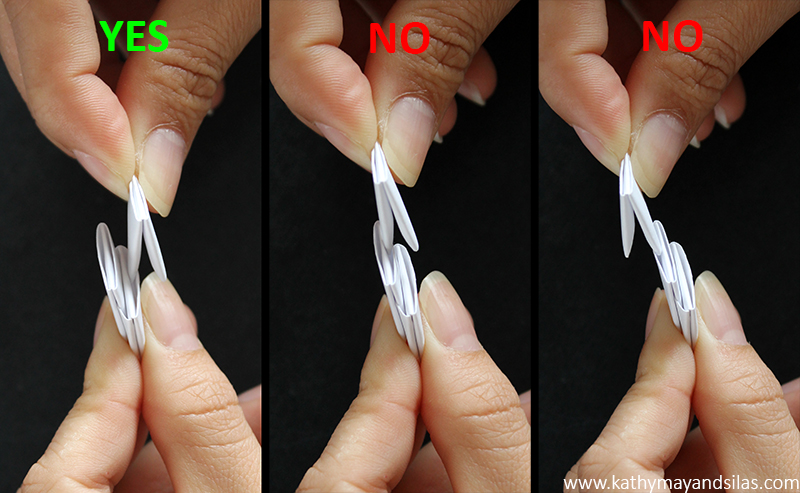
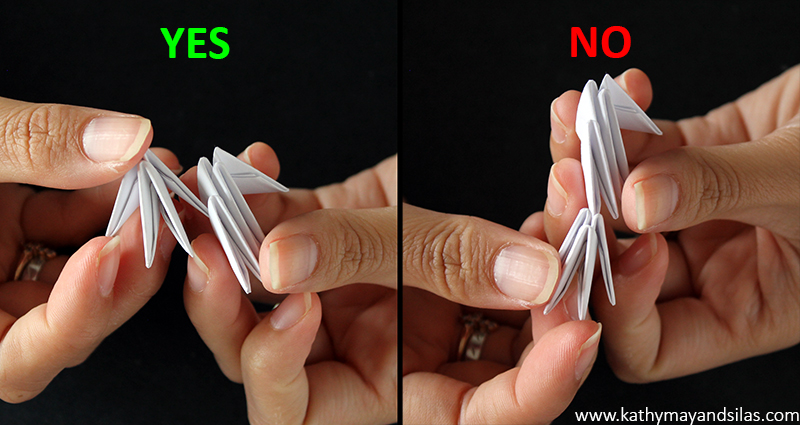
Troubleshooting #2: Make sure that all of your component pieces are facing the same direction (i.e., all hypotenuses of all component pieces should be parallel).
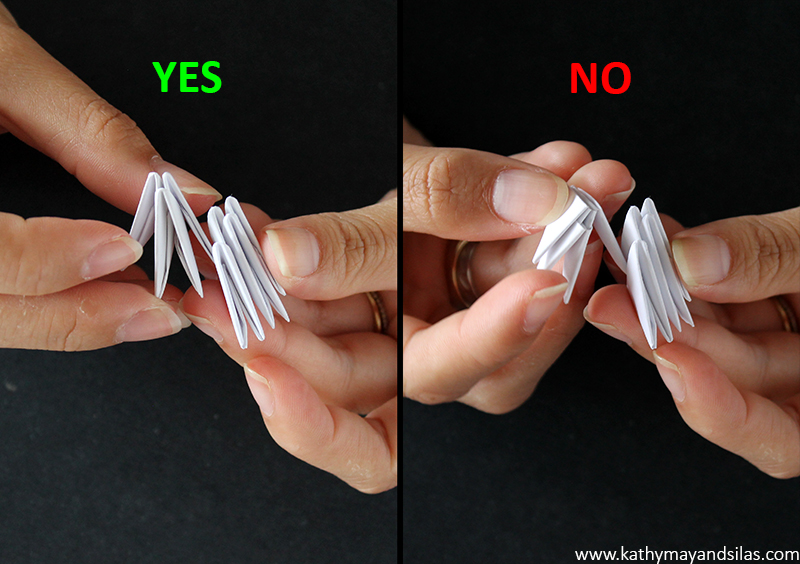
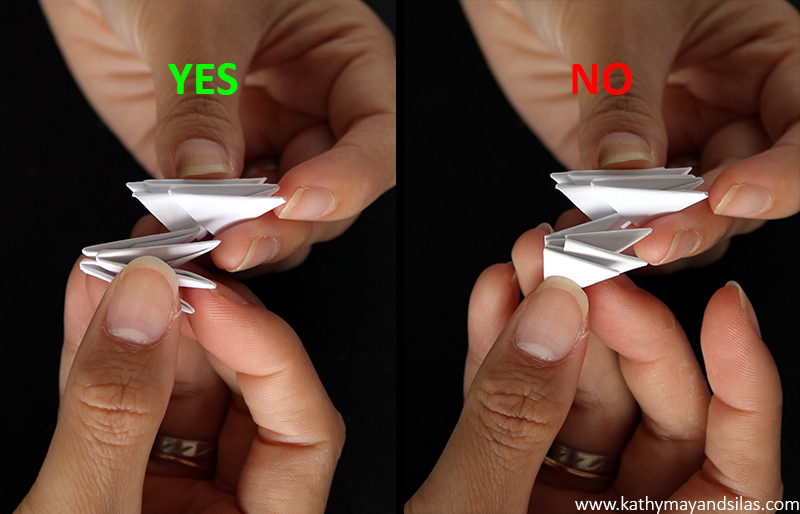
Congratulations on making your 3D origami ring base. Hopefully you made many more than 60 component pieces so that we can go onto Part 3. Stay tuned – happy folding!
Until next time,
Kathy May and Silas
VISIT ALL THE POSTS IN OUR 3D ORIGAMI HOW-TO SERIES!
3D Origami: Introduction
3D Origami: Part 1 – Fold the Component Pieces
3D Origami: Part 2 – Make a Ring Base
3D Origami: Part 3 – Coming Soon!
]]>We always told my mom she should write a book with illustrations and instructions of 3D origami! Unfortunately, you will have to settle for my humble how-to tutorials. After you view the examples of my mom’s 3D origami sculptures below, you can read our how-to 3D origami series to make your own!
VISIT ALL THE POSTS IN OUR 3D ORIGAMI HOW-TO SERIES!
3D Origami: Introduction
3D Origami: Part 1 – Fold the Component Pieces
3D Origami: Part 2 – Make a Ring Base
3D Origami: Part 3 – Coming Soon!
]]>3D Origami: Introduction
3D Origami: Part 1 – Fold the Component Pieces
3D Origami: Part 2 – Make a Ring Base
3D Origami: Part 3 – Coming Soon!
3D ORIGAMI: PART 1 – FOLD THE COMPONENT PIECES
My initial familiarity with origami was a single paper square folded into typical figures such as cranes, fortune tellers, and jumping frogs. In actuality, origami is a diverse art form and there are many types. For example, 3D origami, also known as modular or unit origami, uses identical component folded papers that are assembled into a more complex structure.
My mother learned and practiced the techniques of 3D origami and became quite a skilled artist. In turn, she introduced and taught me her craft. Please click here to see more of my mom’s 3D origami creations.
In this post, I’ll describe how to make the component pieces for 3D origami. In future posts, I’ll describe how to assemble these component pieces into more complex creations!
- Use recycled paper. As in the majority of her projects, my mom made a conscious effort to use only recycled materials. She used the backs of our old school notes, junk mail envelopes, used church programs, etc. I highly encourage you to be as environmentally aware and to do the same!
- Fold your paper. If you are using a standard 8-1/2’’ x 11’’ sheet, fold the sheet in half lengthwise 2x (making 4 rectangles along the top) and in half widthwise 3x (making 8 rectangles along the side). One sheet of paper makes 32 component rectangles. You can extrapolate if using recycled scrap paper that is not whole!
- Cut rectangles. Cut along the folds to make 32 rectangles. Each will be sized 1-3/8’’ x 2-1/8’’ – but no need to be absolutely perfect here!
- Make your component piece.
- First, fold rectangle lengthwise. Then, fold widthwise. Unfold the widthwise fold, leaving a center crease.
- With folded edge towards the top, fold one half of the rectangle diagonally downwards to meet the center crease. Repeat with the other half of the rectangle.
- Flip the folded unit over so that you see a triangle on top, with two rectangular flaps below.
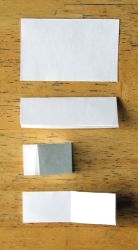
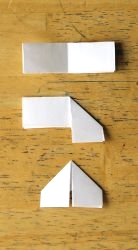
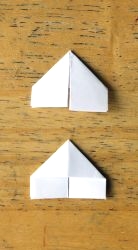
- Fold the outer corner of one flap upwards to meet the bottom of the triangle. Repeat with the outer corner of the other flap
- Fold one flap upwards along the bottom of the top triangle. Repeat with the other flap.
- Fold the triangle in half so that the flaps are on the inside.
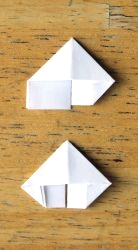
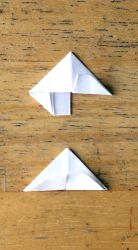
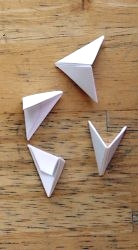
5. Congratulations! This is your component piece!
Believe it or not, folding these component pieces is the hardest part of 3D origami. You will need a large number of component pieces (on the order of hundreds) in order to proceed to the fun, exciting, creative part of this project – the assembly! Hurry up and get moving on folding your component pieces so that we can assemble our 3D origami together! I look forward to seeing you again soon. Happy folding!
Until next time,
Kathy May