This past weekend, my brother Tom-Vinh and I remembered the best mother in the world, our mom Hue Thi Tran, four years after she went to heaven to be with our Lord. We had the opportunity to share this remembrance with not only our family, but also with our friends, at a service at the Vietnamese Baptist Church in Warner Robins, Georgia. We are so grateful to our dear friends who were able to come, and we are just as grateful to those who could not be present in person, but who were there in spirit. We can only hope to be as blessed as our mother was.
Please read below to see the speech that we shared at our mom’s remembrance service.
Afterwards, please scroll to the bottom of this post to see some photographic memories of the event.
Mời các bạn bấm ở đây để xem bài phát biểu của hái đứa con ngày lễ nhớ của Mẹ.
Sau đó, mời các bạn xem một số hình ảnh về lễ nhớ của Mẹ.
“How does one live her life in such a way to be loved in life and remembered beyond? What actions does one do to leave a legacy of kindness and goodwill? Every day, I aspire to be even a fraction of the inspiration she was – and is – and so I think about these questions. And I think a key to it all is that my mom didn’t have to think of it at all – these qualities were her nature and everything she did, she did not for herself but for her children, family, friends, and even complete strangers in the name of God. Her life was the epitome of love, giving, devotion, and faith.
“My mom was born on February 10, 1959 in Saigon, Vietnam, to Nuoi Ba Tran and Lien Thi Pham, into a family of 6 brothers and 3 sisters. She grew up in a war-torn country but was the first of her family, and one of the first “boat people,” who escaped. Her boat capsized near Malaysia, and she survived in the Pulau Bidong refugee camp for years before making it to America.
“When she settled in Pineville, Louisiana, she worked as a custodian. She brought home a menu from the restaurant of the hotel where she worked, learning English from it and studying it, so that she could a position as bus girl and eventually as waitress. When she started a family, her marriage was rocky and full of strife, and she finally found the bravery to leave after many years. However, two blessings came from it – Tom and I became the center of her life, as she is the center of ours.
“We lived below the poverty line for years in Warner Robins but, despite it all, we were happy and healthy. Our clothes may have been hand-me-downs, but they were neat and decent. Our food was purchased with food stamps, but our stomachs were always full of delicious, home-cooked food. We had everything we needed.
“My mom never complained. When we heard gunshots in the dangerous neighborhood we lived, she thanked God for giving us a roof over our heads. When she was attacked in our home and badly hurt, she thanked Jesus for sparing her life and prayed for the healing of our neighbors who also suffered.
“She was blessed with innumerable friends who became the village who raised us, and with a home from Habitat for Humanity that was a dream come true. She was showered with the support and love of brothers and sisters in Christ wherever she went.
“She loved her two dogs, Bucci and April, who were her constant and faithful companions, whom she loved almost as much as Tom and me, and whom followed her to heaven in 2016 and 2018, respectively.
“She believed that education was the key to improving our lives, and she was always excited to learn. Some of our fondest memories are sitting on the floor watching lectures next to her during a sociology class, or watching her tutor her peers during anatomy lab. While she worked full-time and raised us, she earned her college degree and then registered nursing degree. Through all of this, she still found the time to drive us to music lessons and to cook dinner every single night.
“She found her calling as a nurse in the intensive care unit. The work was challenging, but she treasured the relationships that she made with her coworkers and her patients. Many of them kept in touch with her for many years, even if she took care of them only once. For her devotion to her patients and community, she won the prestigious Frist Humanitarian Award, the highest honor from the Hospital Corporations of America. However, she withdrew from the nationwide award in hopes that other regional winners could be recognized for their good works.
“Indeed she had no dreams of being praised, instead believing there was more good that she could do. She assembled hundreds of boxes of school supplies and clothes to send to third-world countries through Operation Christmas Child. She volunteered at school and at church, with Habitat for Humanity, and the Food Pantry at First United Methodist Church. However, most of my mom’s charitable deeds were ordinary acts done quietly and frequently anonymously. She purchased extra turkeys to give to people at the hospital who she knew were tight on money during the holidays. She prepared countless dinners for family members of her patients who were critically ill in the hospital. She volunteered to work nights, weekends and every holiday after my brother and I left for school, so that other nurses could make as many memories as possible with their own children.
“She was artistic and creative. She taught herself to crochet and made clothes for friends, family, and even dolls. She even collected grocery bags and crocheted them into unique purses. She made modular origami swans, paper flowers and plastic bottle bouquets in projects with her beloved grand-nephews. She loved poetry, church hymns, and experimenting with new recipes to cook for Ai, Tom, Silas, and me.
“She was a woman of faith, spending countless hours listening to lectures on Christianity, reading, meditating, and praying upon the good Lord’s word. She loved going to bible study, memorizing huge swaths of the bible. She could recite hundreds of bible verses from memory, never ceasing to share just the right to share with Tom and me, depending on what was going on in our lives.
“When my mom became sick with colon cancer and could no longer work, she moved in with my cousin Elizabeth Ai Tran to Houston, Texas, and later with me and my husband Silas to New York City, and was grateful for the specialized care she sought from MD Anderson and Memorial Sloan Kettering Cancer Centers. My mom fought valiantly and admirably for years with the Lord by her side until He called her home on December 1, 2014, and she went happily with Him. Always thinking about others, she gave her body as an anatomic donation to NYU School of Medicine. As her final wish, she requested that we pray for each other, and to do kind things for those in need whenever we think about her.
“And so we remember our mom. We remember her as a loving, devoted mother who did anything and everything for her children. We remember her as a hard-working woman who single-handedly brought her family up from poverty to create a happy and simple life. We remember her as a kind person who saw to the needs of others before her own. We remember as a Christian who took comfort in the Lord’s word and found blessings in everything and everyone. We remember her as an inspiration who is still loved and treasured by many even to this day. And not only do we remember, but we strive to live in her example.”
Please scroll to the bottom of this post to see some photographic memories of our mom’s remembrance service.
Or, read on below to read our speech in Vietnamese.
“Một nguời sẽ làm thế nào để đuợc thương trong cuộc sống và nhớ sau đó, để để lại một di sản của long tốt và thiện chí? Cuộc sống của Mẹ là hình ảnh của tình thuơng và đức tin. Mỗi điều Mẹ làm trong cuộc sống Mẹ không làm cho bản thân của Mẹ, mà cho hai đứa con, gia đình, bạn bè, trong tên của Ngài. Mỗi ngày, Mây và Tý hy vọng là hai đứa có thế đuợc một phần nhỏ của cảm hứng của Mẹ.
“Mẹ sinh ngày 10 tháng 2 năm 1959 tại Sài Gòn, con gái của Ông Bà Trần Bá Nuôi và Phạm Thị Liên. Trong gia đình có 6 nguời trai, 3 người gái. Mẹ là nguời đầu tiên trong gia đình đi vuợt biển và định cư ở trại Pulau Bidong ở Malaysia cho mấy năm truớc khi qua Mỹ.
“Khi Mẹ định cư ở Lousiana, Mẹ làm ở nhà hàng Plantation Manor dọn dẹp bàn, rồi Mẹ mang cái thực đơn của nhà hàng về nhà mỗi tối để Mẹ học tiếng Mỹ. Khi Mẹ đã hiểu hết, Mẹ được làm bồi bàn.
“Khi Mẹ lập gia đình, cuộc hôn nhân không được may mắn. Sau nhiều năm chịu đựng Mẹ đã dũng cảm li dị, nhưng mà từ li dị, Mẹ đựoc một món quà vô giá – đó là hai đứa con: Hai đứa thành là trung tâm của cuộc đời của Mẹ, y hệt giống Mẹ là trung tâm của hai đứa.
“Sau li dị, gia đình mình sống rất là nghèo khổ trong nhiều năm ở Warner Robins, nhưng gia đình rất hạnh phúc và khỏe mạnh. Tuy nghèo nhưng hai con của Mẹ luôn luôn làn lặn và no đũ. Mẹ không bao giờ phàn nàn, than phiền. Mẹ cám ơn Chúa cho mình một gia đình hạnh phúc. Khi Mẹ bị cứơp và bị thương, Mẹ cám ơn Chúa Jesus đã bảo vệ Mẹ an toàn.
“Mẹ đuợc bạn bè yêu mến, và Mẹ được sự thương yêu của Habitat for Humanity giúp đở Mẹ để xây lên căn nhà cho Mẹ và hai con của Mẹ. Mẹ rất là thuơng hai con chó, Bucci và April. Hai con chó là nguời bạn rất trung thành luôn luôn bên cạnh Me, và Mẹ thuơng hai con chó giống Mẹ thuơng Mây và Tý.
“Mẹ tin rằng giáo dục là chìa khóa để cải thiện cuộc sống của gia đình. Mây và Tý hay ngồi trên sàn nhà bên cạnh Mẹ lúc Mẹ đi lớp xem các bài giảng, và hai đứa hay đi theo Mẹ lúc Mẹ kèm bạn cùng lớp học. Mẹ vừa đi làm, vừa nuôi dậy hai đứa con, và vừa kiếm đuợc bằng đại học và sau đó bằng y tá. Qua tất cả những điều này, Mẹ vẫn tìm thời gian để đưa hai đứa đến học âm nhạc, và Mẹ vẫn nấu bữa ăn tối mỗi đêm.
“Mẹ làm y tá trong ICU. Mẹ hòa đồng với các bạn đồng nghiệp và thương yêu, chăm sóc bệnh nhân của Mẹ rất là chu đáo. Đối với sự tận tâm của Mẹ đối với bệnh nhân và cộng đồng, Mẹ đã đựoc trao giải thuởng Frist Humanitarian Award, vinh dự cao nhất từ công ty bệnh viện của Mẹ. Tuy nhiên, Mẹ đã từ chối giải thuởng toàn quốc vì Mẹ hy vọng rằng những nguời chiễng thắng khác có thể đuợc công nhân.
“Mẹ rất là khiêm tốm, luôn luôn nghĩ về ngừơi khách. Mẹ xếp hàng tram hộp đồ học tập và quần áo để gửi đến các nước nghèo. Mẹ tình nguyện ở truờng, nhà thuơng, nhà thờ, với Habitat for Humanity, và Food Pantry. Hầu hết các hành động từ thiện của Mẹ đã đuợc thực hiện một cách lặng lẽ và ẩn danh. Ví dụ, lễ tạ ơn và lễ giáng sinh, Mẹ mủa them gà tây để tặng cho những nguời không có nhiều tiền.
“Mẹ rất là khéo tay. Mẹ tự học cách móc và may quần áo cho bạn bè, gia đình và búp bê. Mẹ dùng bao-li-long để móc đuợc túi đạc biệt. Mẹ xếp giấy để làm sư tử, bôn giấy. Mẹ khoái thơ, thánh ca. Mẹ rất là thích nấu thức ăn lạ và đạc biệt cho Chị Ái, Tý, Mây, và chồng Mây.
“Mẹ là một nguời của đức tin, và hàng giờ Mẹ nghe các bài giảng về Chúa Jesus, đọc kinh, cầu nguyện theo lời Chúa. Mẹ rất là thích nghiên cứu và đi học kinh thánh. Mẹ có thể đọc được hàng trăm câu kinh từ ký ức, và Mẹ hay chia sẻ các câu này vơi Mây và Tý trong cuộc sống của hai đứa.
“Khi Mẹ bị bệnh ung thư ruột và Mẹ không thể làm việc nữa, Mẹ đã chuyển đến ở trung với chị họ của Mây tên là Chị Ái ở Houston, rồi sau đó với Mây và chồng Mây ở TP New York. Mẹ biết ơn sụ chăm sóc đặc biệt từ MD Anderson và Memorial Sloan Kettering.
“Với tình yêu thương của Chúa bên cạnh, Mẹ đã chiến đấu dung cảm trong nhiều năm qua, và ngày Ngài gọi Mẹ về, ngaỳ 1 tháng 12 năm 2014, Mẹ đã sẳn sang đi về với Chúa, nơi mà Mẹ được nhiều vui vẽ và hạnh phúc. Luôn luôn Mẹ suy nghĩ về những người khác, và Mẹ đã cho sách của Mẹ để nghiên cứu thuốc men ở Trường Y Khoa NYU. Điều ước cuối cùng của Mẹ là yêu cầu mình cầu nguyện cho nhau, và làm những điều tốt đẹp cho những người khác bất cứ khi nào mình nghĩ về Mẹ.
“Và vì vậy anh em chúng tôi nhớ Mẹ. Chúng tôi nhớ Mẹ là một nguời mẹ yêu thuơng, tận tuy, đã làm bất cứ điều gì cho hai đứa con. Chúng tôi nhớ Mẹ là một phụ nữ một mình đưa gia đình thoát khỏi đói nghèo để tạo ra một cuộc sống hạnh phúc và đơn giản. Chúng tôi nhớ Mẹ là một nguời tốt đã nhình thấy nhu cầu của nguời khác trứoc bàn thân của Mẹ. Tuy rằng Mẹ đã ra đi nhưng Mẹ vẫn còn để lại sự thương nhớ và núối tiếc của người thân và bạn bè.”
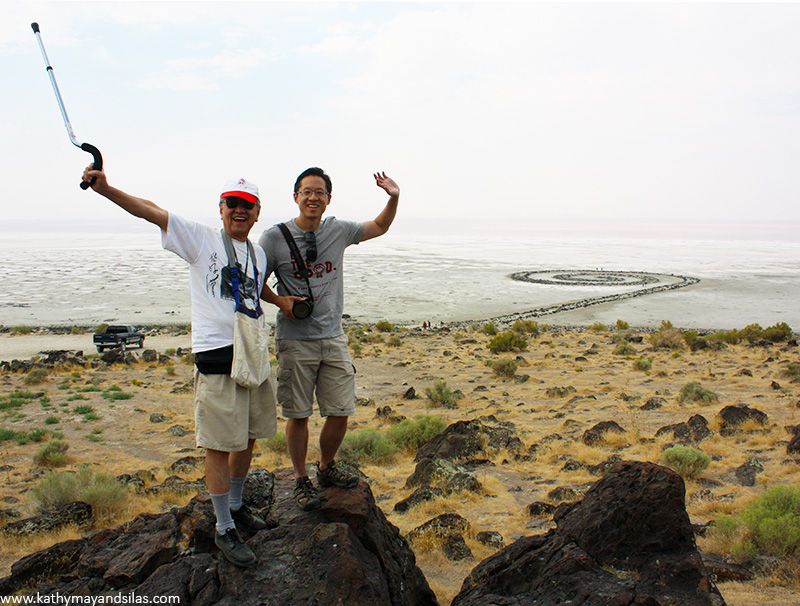
[See image gallery at www.kathymayandsilas.com] ]]>The backdrop of Spiral Jetty is absolutely alien! Looking towards the land, we saw massive basalt boulders left behind by an extinct volcano lying amongst puffs of yellow-green brush and scrub. Then the shore abruptly transformed into a tundra of salt, with a surface that cracked and fragmented under our feet. Eventually, the ground became lattices of crystalline deposits, with miniature salty pyramids atop. In the distance, the waters of the Great Salt Lake appeared reddish, a hue caused by the abundance of microbes.

In making Spiral Jetty, Smithson and his crew (two dump trucks, a tractor, and a front loader) displaced 6,650 tons of mud, salt crystals, and basalt rocks from the shore, strategically repositioning the earth and rock into the interactive curvy structure it is today. From a distance, the design is awesome (see it on Google Maps). From our point of view, the scale was impressive. Spiral Jetty is 15ft wide and 1,500ft long, and we were dwarfed in comparison.
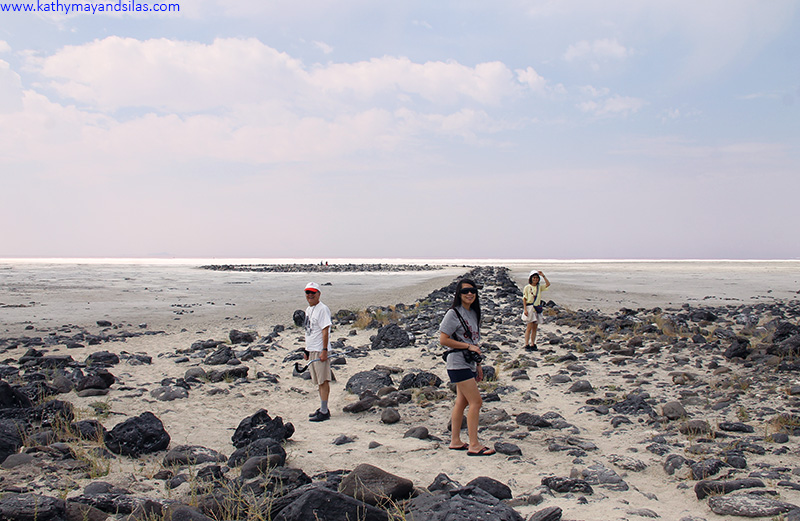
A core tenet of land art is its susceptibility to the cycles of nature. In 1970 when Spiral Jetty was created, water levels of the Great Salt Lake were particularly low. In 1972, it became submerged and remained that way for 30 years, except for rare and brief appearances. However, in 2002, severe droughts caused the lake to recede and Spiral Jetty has remained visible since. We wonder what Spiral Jetty will look like when you visit. Let us know in the Comments section below!
Until next time,
Kathy May and Silas
]]>
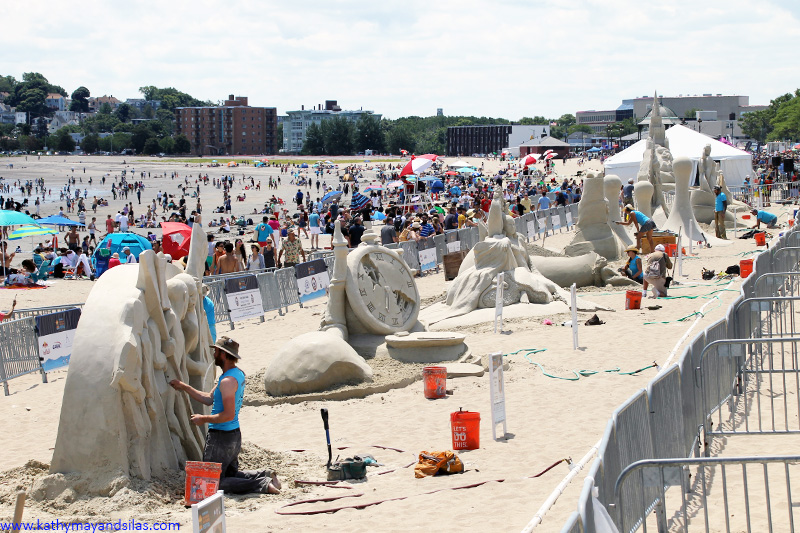
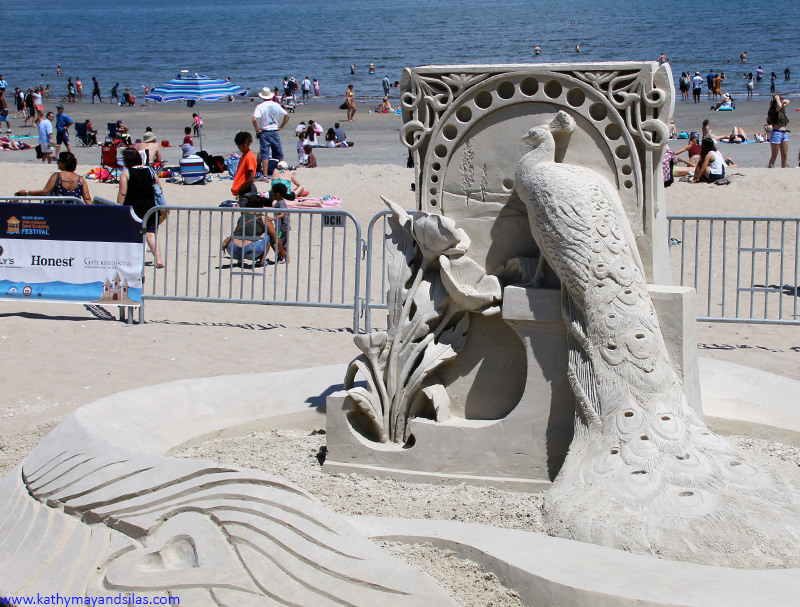
The fifteen master sculptors from nine countries (only three American) collaborated on the centerpiece sculpture which, according to the festival’s theme of “celebrating literacy,” depicted classic literary works throughout the generations. You can see it above in the cover image of this blog post. How many allusions to our favorite childhood books can you spot?
Sand art at the festival was not just collaborative, however: It was a competition with a massive cash prize! Over three days, each artist had 24 hours to transform ten tons of sand into a magnificent sculpture within an 18’x18′ area. The sand used in the festival was not ordinary Bostonian beach sand. Over 350 tons of special granite sand were hauled in from Hudson, New Hampshire! Reportedly this particular sand is a favorite medium for these specialized artists, because the texture is ideal and the strength is strong for stand-alone sculptures.
The pieces were judged on degree of difficulty, originality and creativity, quality of sculpting, and overall visual impact. The 1st Place Winner was “Vanishing Muse” by Pavel Mylnikov from Moscow, Russia. This was his fourth time competing at Revere Beach, and he also was last year’s winner!
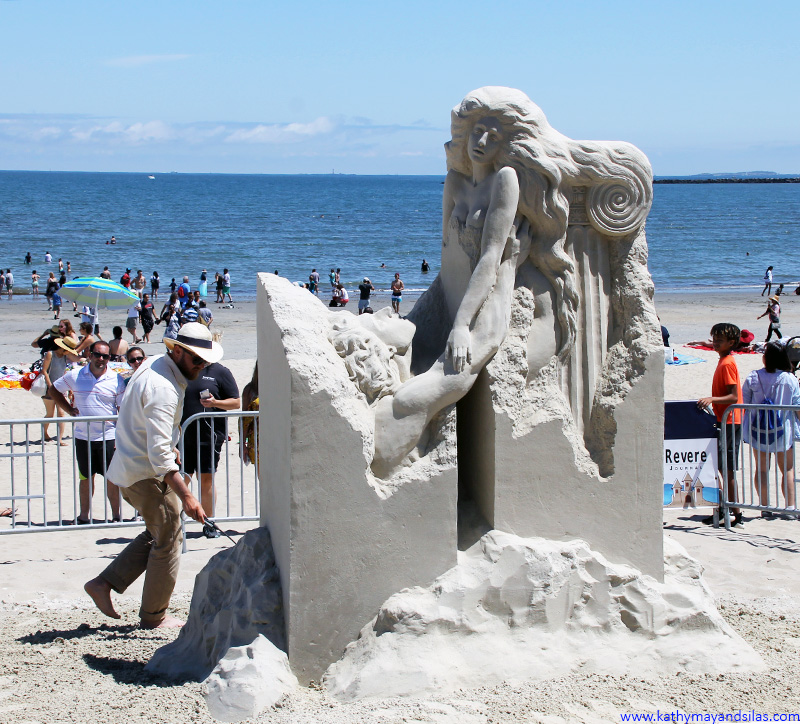
There were a number of marvelous sculptures otherwise, and the public was invited to vote for their favorite. “A Nouveau Love,” created by English artist Rachel Stubbs won the People’s Choice Winner. It was also the judges’ selection for 5th Place Winner!
Click on the photo album below to see some more sand sculptures. Next July, don’t miss the 2019 International Sand-Sculpting Festival! It’s fun, free, and sure to be a fantastic day! We’ll see you on the beach!
Until next time,
Kathy May and Silas

Ngày Chủ Nhật, mồng 5 tháng 8 năm 2018, Trần April (Picaroo) đã lên thiên đàng với Mẹ (Trần Thị Huê) và con chó của mình, Trần Bucci (Chì Chì). April là thành viên đạc biệt của gia đình, và mình mời các bạn bấm ở đây để đọc đài kỷ niệm và xem hình ảnh của April.
Until next time,
Kathy May and Silas
Mothers hailing from different cultures on every continent have been “wearing” babies upon their own bodies for centuries. Traditionally, baby-wearing is a convenient and pragmatic method to keep track of little ones, while continuing activities of daily life and maintaining the intimacy of mother and child.

Nowadays in North America, baby-carrying cloths are trendy accessories that are marketed under brands like Moby Wrap, Boba Wrap, and Baby K’Tan. But why limit baby-wearing slings, wraps, and carriers to human babies? We decided to make our own wrap… for our pup Mimi!

The idea actually began during our hikes. Mimi is thrilled to scramble up rocks and down paths but, as every one of our human strides is ten of her Maltese steps (times four paws), she tuckers out! We made our own wrap, so that we can carry Mimi during strenuous portions of the trek. The wrap started out as a silly but actually has turned into a very pragmatic piece of equipment! Here is our incredibly simple and quick project – you can make one too!
1. Select 2.5y (90”) of cloth. Our choice was a whimsical folk pattern of quirky birds and playful flowers. This is a 100% cotton fabric that is strong enough to support Mimi’s weight. Ffun fact: Her weight is less than that of most newborns! This fabric also has just a little bit of elasticity for our comfort and for hers. Finally, it is conveniently machine-washable.

2. Cut the cloth length-wise. Most bolts of fabric are either 45” or 60”. If your original bolt is 45” in width, then halve the fabric lengthwise to make two rectangles sized 22.5”x90”; if your bolt is 60” in width, then halve it to make two rectangles sized 30”x90”.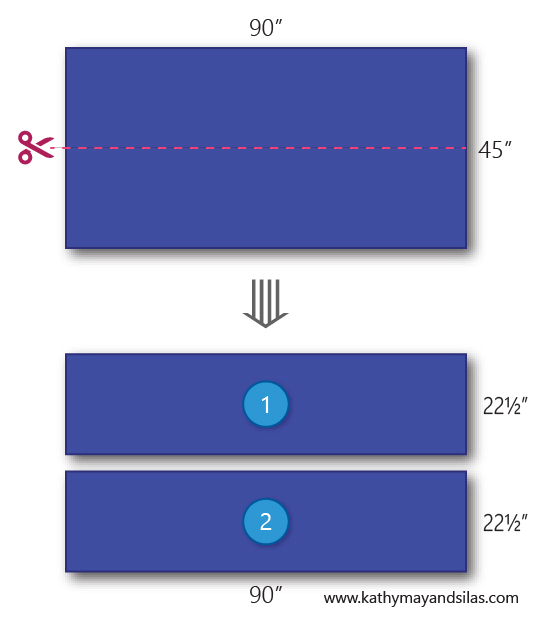
3. Fold and iron the edges of both long sides and one short side of each cloth. This is to prepare the hem of your cloth. Fold the edge of the cloth by less than a centimeter then iron flat. Then, re-fold the edge by less than a centimeter again, and then iron flat.

4. Pin the three folded edges on each piece of cloth and then sew them. Pin the edges that you have ironed flat, so that you may easily sew them. This is the final part of hemming your cloth. You can do this by hand or with a sewing machine. We used the latter, given to us by Kathy May’s mom. We opted for a zig-zag stitch rather than a straight stitch so that it could stretch with the fabric!


5. Join your cloths by creating a flat-felled seam between the two short un-hemmed sides. A flat-felled seam is a strong and durable seam, ideal for our wrap which would endure the stress of supporting a dog and frequent machine washes. It also encases both raw edges for a clean finish. Finally, it is completely flat for our comfort and Mimi’s.
Here is a cross-section schematic of what the flat-felled seam is:
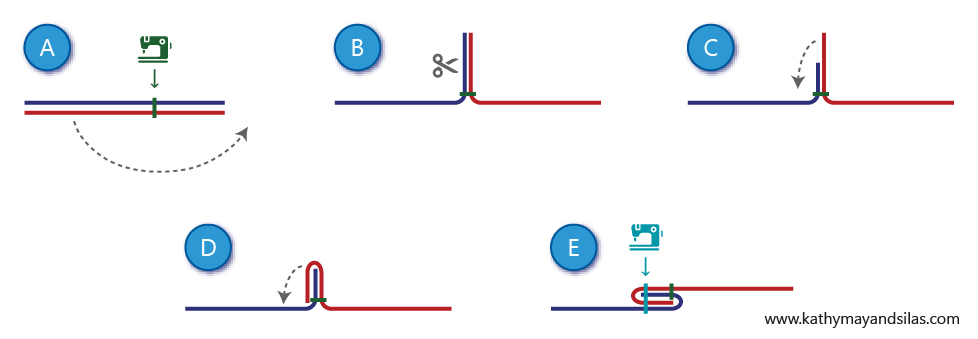
This short and easy-to-follow video taught us how to create this professional-looking seam.
6. Wrap your dog! There are a number of ways to wrap your dog (or baby) on your chest or on your back, but we have found the easiest is the method recommended by the popular Moby Wrap and Boba Wrap. See our quick how-to video, featuring the one-and-only Mimi! Music credit: “The Printed Word” by David Hilowitz.
As you can see, the doggie wrap is essentially a very long piece of cloth with finished edges! We spent just a few dollars on this project with the purchase of the fabric, rather than spending $50+ on a designer baby wrap! Our doggie wrap can be folded and stashed into our bag, or tied around our waist, only to be whipped out when Mimi starts to tire. From the first use, she loves the doggie wrap! As you can see from the video, she jumps up happily to be placed into the wrap and enjoys being carried. Once she’s inside, she relaxes and enjoys the scenery. We hope that you make one of these adorable and pragmatic wraps for your pup (or maybe your baby)! Let us know what you think in the comments below!
Until next time,
Kathy May and Silas

]]>
SHELTER
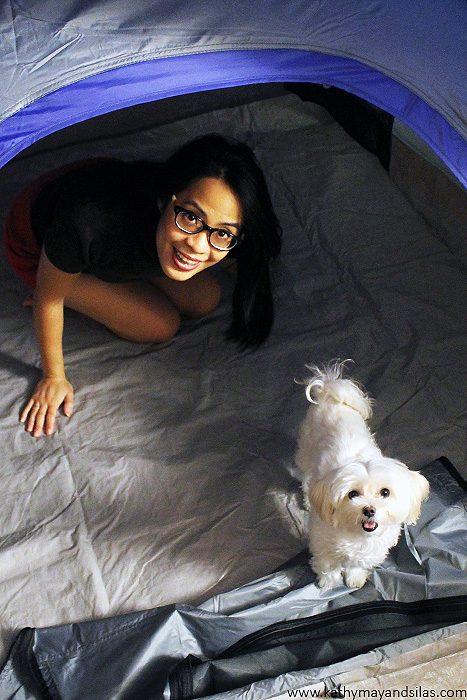
Not surprisingly, the first thing that comes to mind when one thinks of camping is a tent! Tents are classified by size, material, weight, weather durability, etc. They range from cozy single occupancy to multi-room structures with several entrances. Below are some basic types of tents. Additionally, consider a tarp: While the tent is very important, the tarp is too. Although not particularly a necessity, tarps can protect the tent from tears by rocks and rough terrain below, and also from wet and soggy ground. 
 Dome tent: The dome tent (A) is the most popular type of tent for casual campers. Two to three curved poles intersect at their centers to support this tent. Dome tents are free-standing structures that can be picked up and moved versus staked down. They provide plenty of head room compared to the footprint.
- Hoop tent: Similarly to the dome tent, the curved structure of the hoop tent (B) allows precipitation to slide off of the tent. Hoop tents consist of arches of poles arranged in series.
- A-frame tent: The A-frame tent (C) is simple and classic. A single horizontal ridge pole is supported by two poles on each side that meet at an apex. A-frame tents are less roomy because of the steep sloping sides.
The forecasts for our desert destinations called for a whopping 0.5” rain per month so we anticipated little need to shelter from rain, sleet, or snow. We purchased a three-person tent which is ample room for just the two of us, our equipment, plus Mimi when she joins us on future trips. We also opted for a heavy-duty polyethylene tarp similar to what we use on the Habitat for Humanity construction sites. While ground moisture was less of a concern for the present trip, the tarp protected from rocks that may cut the tent.
SLEEP
When it comes to staying warm, the sleep system is one of the most important factors of camping. We prioritized this for two reasons: Firstly, the desert’s lack of humidity prevents retention of heat radiating from the ground after the sun goes down; this means that it gets cold at night! Secondly, Kathy May is always cold no matter what! Thanks to the warm sleeping bags from Silas’ parents and from Kathy May’s medical school friend, Sam, we were able to save a few dollars for this trip. We did, however, investigate sleeping pads. These are certainly not a necessity; however, they’re not exactly a luxury either, especially on camping trips that are days-long. Look for the “R-value” which denotes insulating capacity. In addition to providing warmth, sleeping pads also ensure better rest and comfort, a reward after days of grueling hikes and exhausting travel.

- Air: Inflating sleeping pads (A) are the most comfortable of camping sleeping pads. Some disadvantages include poor insulation, need to pump or blow up, and, most of all, propensity for puncture and leakage. Camping mattresses (B) are hybridized with air mattresses. Creative alternatives include pool rafts or floats; interestingly, many inflatable sleeping pads are advertised to double as flotation cushions!
- Self-inflating: To use a self-inflating pad (C), roll it out, open the one-way valve, allow air to enter, and then close the valve. These are not as thick as air pads and are therefore less comfortable; however, they are more compact and light.
- Closed-cell foam: This dense material is designed to prioritize insulation over comfort. They are no-nonsense – just open and use – and can also function as sitting pads. On form is (D) an roll-up style; another is (E) accordion style. Creative alternatives are yoga mats, Kindermats, and interlocking foam tile or puzzle mats.
- Alternatives: Cots are a possibility, or even simply pillows, blankets, and comforters. Most basic of all is the classic pile of boughs and leaves (that are placed under your tent, of course), which provide both cushion and insulation.
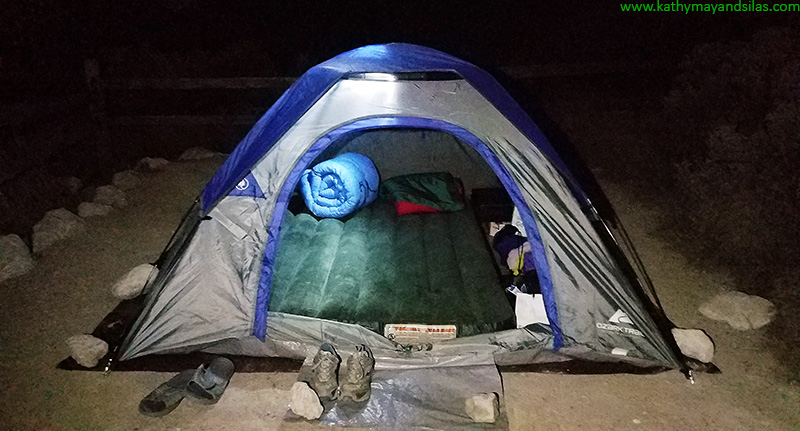
In honesty we scoffed when our friends mentioned that campers bring air mattresses to the great outdoors, but we surprisingly settled upon a camping mattress, which is just that! Our single height, full-size camping mattress is a cheap, simple option that ensured comfort over a week of sleeping on the ground, in a desert environment without soil, grass, or leaves to soften our slumber. It has a battery-operated pump for inflation in minutes.
FOOD
In case you’re wondering (we were) – no, the romantic idea of cooking over the fire is not advisable… unless you are just roasting marshmallows. It is inefficient and will burn cookware! Burying foil packets in mature coals is possible, but at the risk of carcinogens. Camp stoves are a much better idea. There are many options, with considerations of your desire for a home-cooked meal versus just boiling water, as well as factors such as portability, weight, and fuel.

- Petroleum stoves: Petroleum stoves (A) are fast and effective, even at very low temperatures; however, they may not be ideal for backpacking because of their weight and bulk. They utilize easy-to-find white gas, kerosene, jet fuel, or even gasoline that is poured into a reusable fuel canister and then pressurized by hand pump. It’s easy to see why these can be messy and dangerous!
- Liquid gas stoves: These are easy to use and efficiently utilize pressurized butane, isobutane, or propane with a clean burn; however, fuel can be expensive and canisters are not refillable. Tabletop burners (B) are analogous to gas ranges with which we’re familiar – the fuel container screws into the system. Alternatively, canister stoves (C) are great for backpacking – the stove screws directly onto the fuel container.
- Chemical solid fuel stoves: Of all the options, this is the most simple, small, and light. Many stoves are even foldable (D)! Fuel tablets, or small blocks of organic compounds (hemamine, Esbit, Triox, and more), are burned. Unfortunately, each tablet only lasts a few minutes, does not generate much heat, and can leave a brown sticky residue on cookware.
- Alcohol stoves: Alcohol stoves (E) may utilize cans that look similar to the heat element under the chafing dishes at catered events. Or, they can even be homemade from tin or aluminum cans! Though they are simple and clean-burning, they do not generate a great deal of heat.
- GORP: Especially with car camping but even with backpacking, camp stoves are not a necessity! You could always go with “good old raisins and peanuts” and other foods that don’t require cooking or refrigeration. Breads, peanut butter, canned meats and fish, cereal, bars, are some ideas. Don’t forget to stash some chocolate, candy, cookies, and cake!
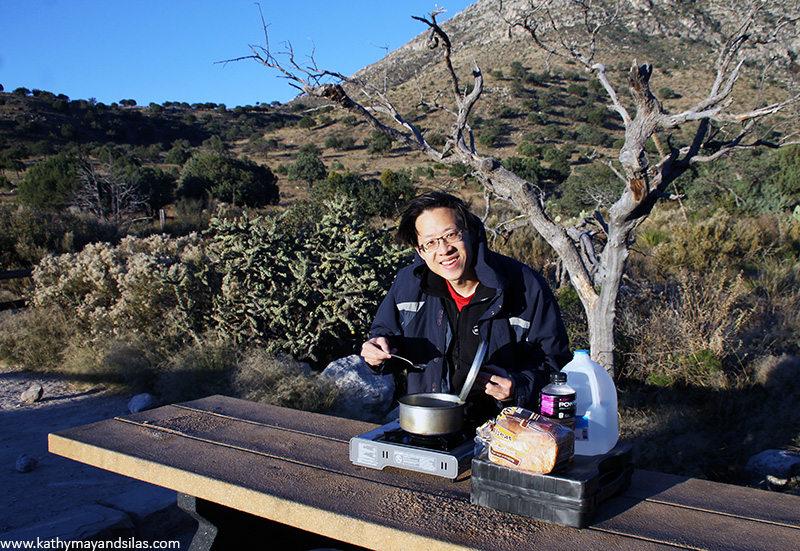
We opted for a simple tabletop butane stove with a single burner, effective for boiling water and heating foods in a small pot. Screw the canister into the stove, turn the dial, and then light!
SAFETY
- Illumination:
- A lamp with a hook is very helpful. It can be hung from the inside of the tent for illumination while you’re in it; while it’s hung the tent will glow to provide ambient light while you’re outside of it. It can also be carried with you during short walks.
- We also prioritized bright handheld flashlights with wide fields to light our way. In addition to standard sized flashlights, we also carried smaller convenient cylindrical flashlights to easily stash in our bags and pockets. We brought along a tactical flashlight, too, given to us by Kathy May’s brother Tom-Vinh.
- We found head lamps incredibly useful. Being hands-free allowed us to pitch our tent, cook food, explore caves, and go on short walks to the washroom in the darkness. They virtually obviated the need for handheld flashlights (though, once again, it was helpful to keep a mini cylindrical flashlight for convenience in case we didn’t have access to our hook lamp or head lamp. When strapped to a water jug, they also provided great ambient light similar to another lamp.
- Electricity: Our destinations were very remote, sometimes miles away from electricity and cell phone signals, and hundreds of miles away from cities. However, being the unfortunate modern creatures we are, we needed some volts to charge our electronics.
- Electronics that we brought included: Mobile phones, camera batteries, dash cam, action cam. We also brought a small netbook to transfer the thousands of pictures we take from memory cards to a portable hard drive.
- An car AC power inverter is one of the best car-related purchases we’ve made (for camping and not). It plugs into the cigarette lighter and provides DC-to-AC sockets, as well as additional USB charging ports and a 12V cigarette lighter socket. Ours is even shaped to fit into the cup holder.
- We couldn’t run our car all the time to run the AC inverter, so we brought our rechargeable high-capacity battery pack for emergency power (mostly our mobile phones). Don’t forget to put your phone in airplane mode if you’re remote with absolutely no signal to prevent unnecessary power depletion.
- You’ll need to consider alkaline versus rechargeable batteries for your lights, pumps, walkie talkies, etc.
- First-aid kit: This list seems extensive but one can tailor the supplies to his/her particular trip and pack it in a compact area. You should consider the following.
- First-aid supplies such as adhesive bandages, gauze, antiseptic topicals, antibiotic topicals, sterile wipes and rinse.
- Topicals such as hand sanitizer, soap, sunblock, sunburn relief, bug spray, sting relief.
- Medicine such as ibuprofen, acetaminophen, hydrocortisone, antihistamine, Epi pen, anti-diarrheal meds, antacids, cough drops. Don’t forget your typical prescription meds too.
- Miscellaneous supplies such as surgical gloves, tweezers, safety pins, scissors, scalpel, utility knife, duct tape.
- Campfire: Though it’s a core idea of “camping,” our desert destinations banned campfires for obvious reasons. We’ve received a good deal of advice on campfires but thus far do not have firsthand experience; we’ll update this as we try it out in the future!
Well, there you have it! That’s basically everything that we know about camping so far! We are mere novices (as suggested by the fact that we went car-camping as opposed to backpacking). Surprisingly, it can be expensive to live in the wilderness, and some equipment is costly. However, most equipment requires one-time investments only, or gadgets that we use in our everyday lives anyway, so we were able to find a budget-friendly way to be comfortable during our camping road trip! If you have any tips on frontcountry camping, please do share them below in the comments! We would appreciate more tips and learning from you!
Until next time,
Kathy May and Silas
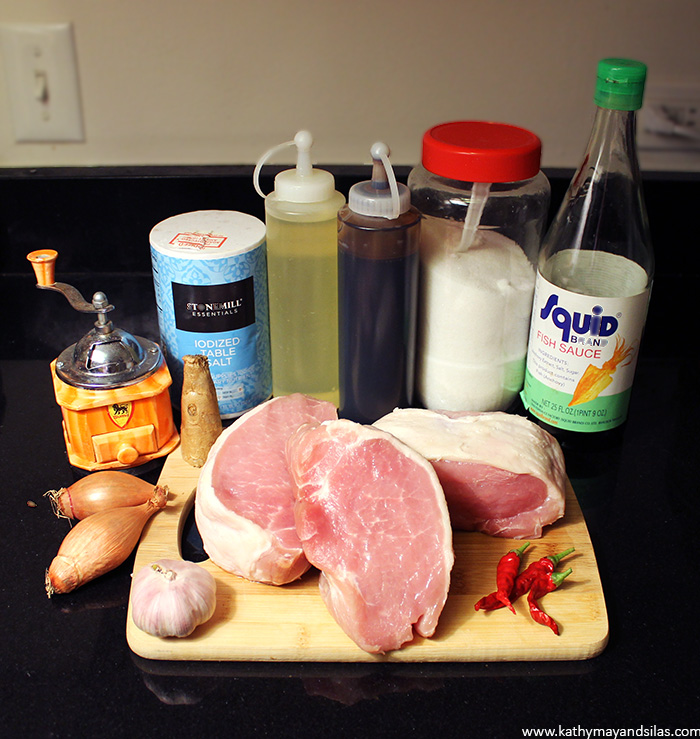
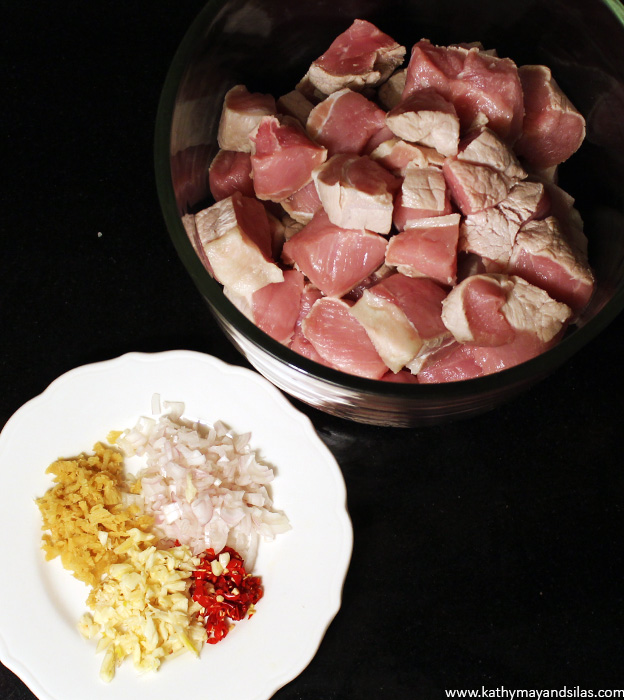
Gather ingredients. These are common items that would be found in any Vietnamese kitchen!
- Pork (thịt heo): Virtually any cut is possible. Thịt ba rội (pork belly) is a favorite in Vietnamese cuisine. Sườn (short ribs) are another delicious crowd-pleaser. We have opted for loin for the leanest option.
- Shallots (hành tím)
- Ginger (gừng)
- Garlic (tỏi)
- Chili peppers (ớt): We used a combination of cayenne and Thai chili peppers from our very own balcony garden!
- Salt (muối)
- Pepper (tiêu): We will use black and white peppercorns straight from Vietnam, given to us by Bác Mai. These will be freshly ground in a pepper mill from Ngoại.
- Sugar (đường): Kathy May’s mom (Mẹ) frequently used either rock sugar or granulated sugar or a combination of the two. We will use the latter which we have quickly on-hand.
- Fish sauce (nước mắm): Possibly the most quintessential element of Vietnamese cuisine.
- Dark soy sauce (nước tương): This is not a typical ingredient of thịt kho, but it is a secret weapon that Mẹ used! Dark nước tương is less salty but more colorful than the light version. This will help to achieve the perfect aesthetic of our thịt kho.
- Oil (dầu)
First, clean and cut the meat. Bring a large pot to boil and drop your uncut piece of pork into it for just a minute or two. This cleans the meat, preventing the proteinaceous build-up that can happen during cooking, and also remove any porky smells, just leaving the pure flavor of the meat. Chop the pork into chunks (slices would also be acceptable for similar taste but different aesthetic). Dice ginger, shallots, garlic, and chili in preparation.
Marinate the meat. Marinate the pork for at least 30 minutes (the longer the better) with the diced aromatics. Also add salt, pepper (lots of it), sugar, and fish sauce to taste. Remember that thịt kho tiêu tends to be more salty, and it will be served with plenty of rice, so we will be generous.
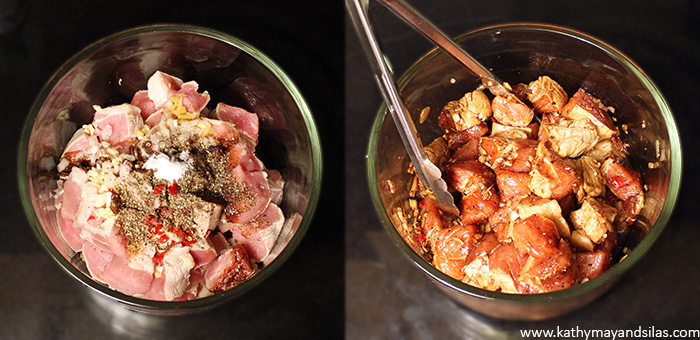
Brown the meat. In a pot large or pan, add a couple tablespoons of cooking oil. Saute garlic until it becomes aromatic. Add the pork and brown the outside. This step helps to seal in the juices; the meat need not be fully cooked.

Make the nước màu (caramelization). While the pork is browning, we will prepare our caramelized sugar, which is the main step of making thịt kho. Note that many home cooks will recommend caramelizing the sugar first and then adding the meat in it to braise (that’s the way Kathy May’s mom does it). However, we as more novice cooks opt to do caramelize sugar and add it separately, for the reason that sugar on heat can be difficult to control. Furthermore, caramel may be made without water or oil, but the addition of these also make the process easier. We will add a couple tablespoons of cooking oil and a few tablespoons of sugar on a warm – not hot – pan. Turn on the heat and gently melt, stirring the entire time. Do not take our eyes off this sugar! It burns easily and rapidly!
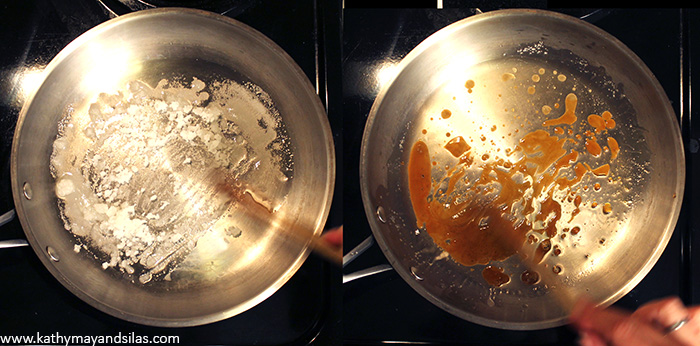
Add the caramel to the meat. Once the sugar browns nicely, take it off the heat (still stirring constantly) and it will continue darkening over seconds. If your sugar is burned or overcooked, throw it away and start over! If your sugar is not brown enough, it will be insufficient to color your meat. Add the caramel directly to the pot of meat.
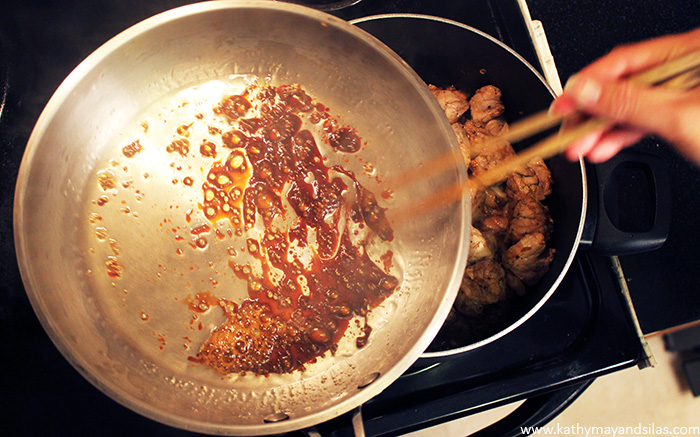
Braise the meat. Continue cooking the meat, stirring occasionally to distribute the sauce. Liquid will come from the pork; there is no need to add more water or coconut juice as in other versions of thịt kho.

Achieve a delicious brown color. As the liquid boils away, the pork will become a scrumptious dark reddish brown. If the color is not brown or deep enough, add a little dark soy sauce (that’s the secret shared by Kathy May’s mom!).
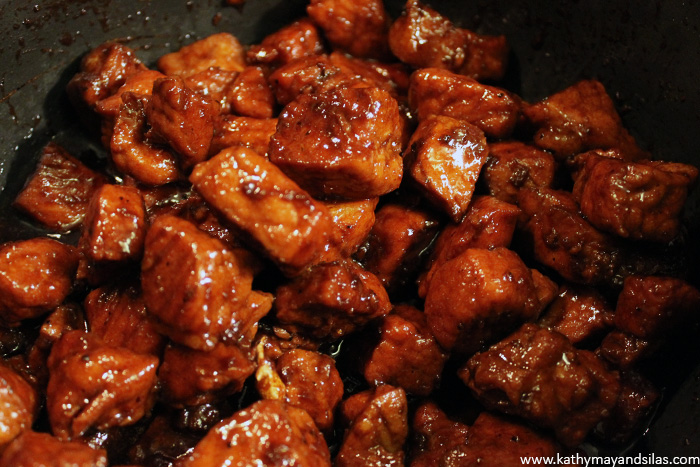
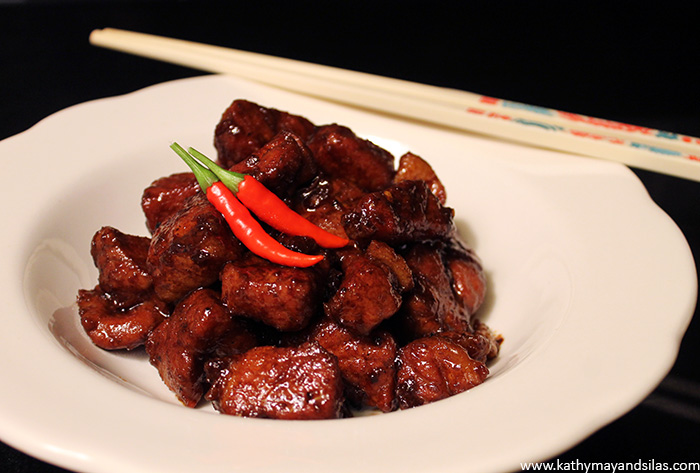
Bon appétit. Our thịt kho tiêu has a saltiness that is distinctively Vietnamese from the fish sauce marinade; also sweetness from our labored-upon nước màu (caramelization) that provides a depth of flavor; and finally a pleasant bite from the fresh pepper without being outright spicy! A generous bowl of steaming white rice is an essential accompaniment. We will also enjoy it with a vegetable side.
Please share with us your versions of thịt kho tiêu by dropping a note in the Comments section below. Do you have tips and tricks to share? We would love to learn from you and experiment from your recipes!
Until next time,
Kathy May and Silas
Arrival at Mount Desert Island
Acadia National Park is located just 4-5 hours north of Boston, in the “Down East” region of Maine. The bulk of its 47 thousand acres sprawls across Mount Desert Island (the rest lies on Isle au Haut and Schoodic Peninsula). Originally named “L’île des Monts Déserts” or “Island of the Bare Mountains” by French explorer Samuel de Champlain in 1604, Mount Desert Island has a modern-day pronunciation that is under much debate. Many Maineiacs retain the French fashion of stressing the second syllable (though with a different tone) and say “de-ZERT” (dəˈzərt), much like the noun of “sweet course eaten at the end of a meal” or the verb of “to abandon, fail, or run away.” Others pronounce it according to the English pronunciation and say “DEH-zert” (ˈdezərt), much like the noun of a “dry and barren area of land”; the latter pronunciation is often used by visitors, too, purely because of the spelling. You’ll find that the border between park grounds and commercial areas are blurred, so you’ll never be too far from creature comforts while at Acadia.
Sunrise over Bass Harbor Head Lighthouse
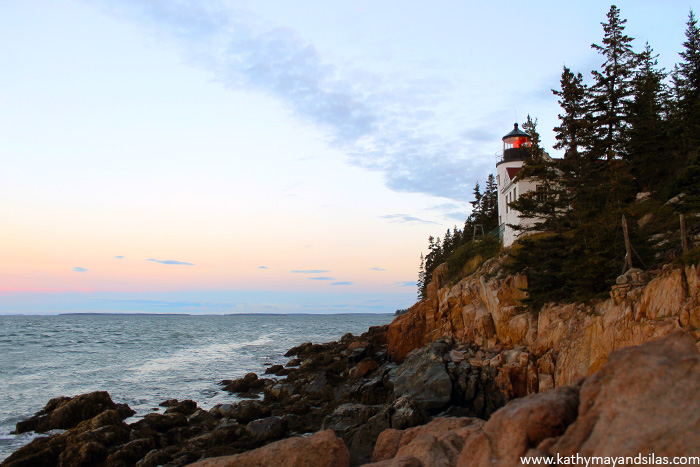
Ancient glaciers carved out the fjord of Somes Sound which divides Mount Desert Island into two lobes: a popular eastern side drawing over 3 million tourists a year, and a more undisturbed western side often referred to as the “quiet side” of the island. At the southern tip of the quiet side, we awoke in the wee hours and scrambled across the rocky shoreline to relish in the first morning light at the Bass Harbor Head Lighthouse. If you learned about “signature” signals of lighthouses from our Nauset Light blog post, you’ll be interested to know that Bass Harbor Head Lighthouse’s signature signal is red light occulting every four seconds (three seconds red; one second off). If you’re a photographer in search of spectacular sunrise snaps, please note that the accessible cliffs are to the east of the lighthouse; therefore, you’ll see the sun rising opposite to the lighthouse not over it. A more iconic Acadian sunrise may be Cadillac Mountain (later in this post) though you’ll have to share it with considerably more visitors than at Bass Harbor Head Lighthouse.
Ship Harbor Trail on the Quiet Side of Mount Desert Island
Also on the quiet side of MDI, we stumbled upon a fantastic 1.3 mile trail that was a real gem. The Ship Harbor Trail was a pleasant, easy, fairly level walk (even Mimi could do it; see video below) that took us through rapid changes in scenery, from roadside through pine forest, suddenly opening up into a peaceful cove of pink granite, and then to rocky coastline and the wide open blue ocean. Along the way, every section had a great deal to explore, including lush vegetation and wildlife, tide pools in the granite crevices, and panoramic vistas of trees, rocks, and water, in an intimate setting. As an alternative, you may also choose to add on the Wonderland Trail to the same trek; it is an equally easy hike of similar distance that is just half a mile east of the Ship Harbor Trail with similar views and terrain.
Dramatic Coastline of Ocean Path Trail Along Park Loop Road
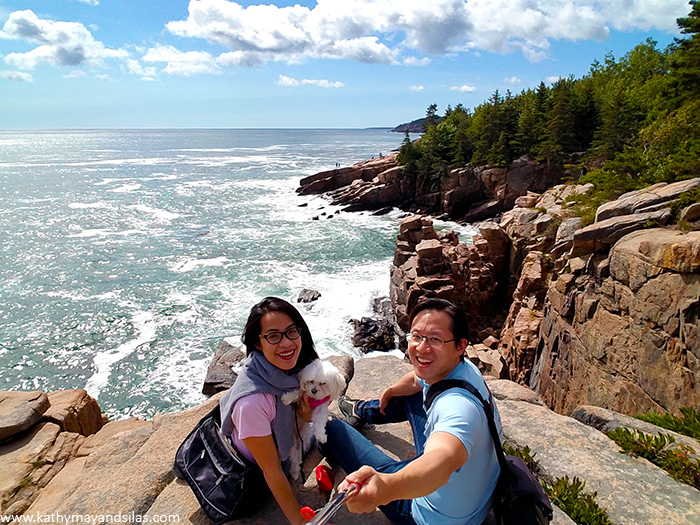
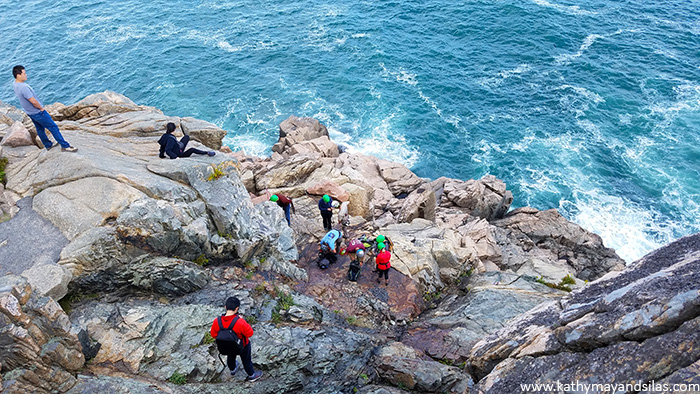
The Park Loop Road is a one-way 27-mile drive on the east side of MDI where tourists oftentimes begin their adventures in Acadia. If you do not have a car, the National Park Service provides a free shuttle called Island Explorer which operates seasonally. Regardless, you should get out of the car and take advantage of the stunning Ocean Path, which runs alongside the eastern part of the loop. It is easy to see why Ocean Path is Acadia’s most iconic trail, as it provides a sampling of the diverse terrain of the northeast, from its playful beaches to fearsome rocky cliffs to shady forests to scenic mountains. Expect to spend a disproportionately large amount of time to cover just 2 miles of trail. You’ll find yourself exploring the nooks and crannies of the points of interest, including Sand Beach, Thunder Hole, Monument Cove, Otter Cliff, and numerous lookouts along the way.
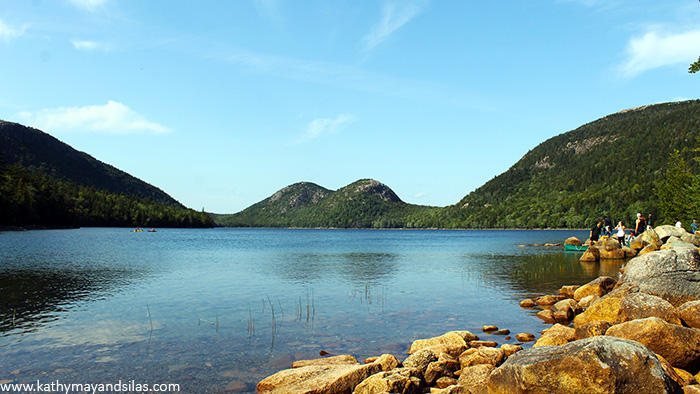
Glacier-Carved Landscape at Jordan Pond
Jordan Pond is a tarn, or a mountain lake that is formed as a glacier melts, with exceptional visibility as deep as 60 feet! The glacier whose pristine water now fills Jordan Pond and also supplies fresh water to the village of Seal Harbor was the Wisconsin Ice Sheet from approximately 2.6 million to 11,700 years ago. Historically, Acadia was a beloved summer retreat for the likes of the Rockefellers, Vanderbilts, Morgans, Fords, Astors, and Carnegies, and Jordan Pond was the central location at which they reportedly relished the view of the North and South Bubbles, two humps of mountains with many popular hiking trails.
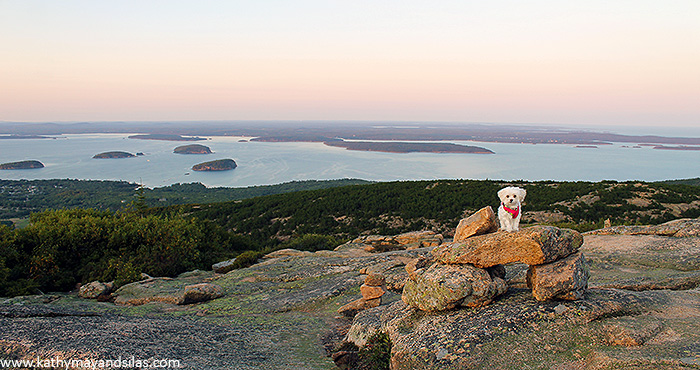
Sunset on Cadillac Mountain
At 1,530 feet, Cadillac Mountain is not only the tallest mountain in Acadia, but also it is the tallest mountain along the American Atlantic coast (the tallest peak of all the Atlantic coast is in Rio de Janeiro, Brazil). From here, one may view the first sunrise in the continental USA (as a technicality, this only occurs because the horizon may be viewed earlier from the elevation of Cadillac Mountain; the easternmost point in the continental USA to view the first sunrise is in Lubec, Maine; if you want to get more technical, then it’s at Semisopochnoi Island, Alaska, which is west of the 180-degree meridian). Alas we did not see the sun rising over Cadillac Mountain, but we did enjoy the 360-degree panoramic vistas from the summit at sunset. The mountain itself is fascinating, formed by upward forces of volcanic and tectonic plates colliding, then sheared by monstrous glaciers, leaving behind deep gouges in pink granite and a rounded peak. Note that this location in Acadia is incredibly popular and budget more time than expected to travel and find parking along the 3.5-mile Summit Road. If you are not traveling by car, know that the free shuttle buses stop at the North Ridge Trail but do not go to the top of Cadillac Mountain. From that trail head, you can either hike or take one of two private buses with narrated tours.
All in all, we had a splendid adventure at Acadia National Park and we look forward to experiencing it during different seasons in the future! Please stay tuned to our blog as we visit other national parks, monuments, historical sites, and more. Our past leaders have compassionately led the protection and preservation of treasures within the National Parks Service and, with current events, we are saddened that many of these sites are now at risk. We’ll leave you with a quote by President Franklin D. Roosevelt in hopes that you’ll support the National Parks Service and what they mean to our country:
“There is nothing so American as our national parks…. The fundamental idea behind the parks…is that the country belongs to the people.”
Until next time,
Kathy May and Silas

References:
National Parks Service
Acadia Magic by Greg Hartford
Joe’s Guide to Acadia National Park
]]>
Mimi is a happy, peppy pup and the theme we chose was equally fun and playful. For the basics of the main design elements, we used pre-made vector files of a simple house from clker and anthromorphized flowers from freepik. There are innumerable free vectors available online, and a large advantage of vector art is that they can be imported into Adobe Illustrator to save a great deal of time in the design stage.

That being said, there was still a great deal of legwork to be done to modify the vector art into Mimi’s design (don’t worry, we won’t go into the nitty gritty in this post). In addition to tweaking the vector art, we also added other details including Mimi’s name to customize the design. After finalizing the design, we prepared the Illustrator file for the laser cutter. The instructions for the laser cutter – engrave, line, cut, etc. – are communicated via color. In this image, for example, cyan commands “vector cut”; navy blue commands “vector line”; and black, royal blue, and red command variable depths of “engrave.”
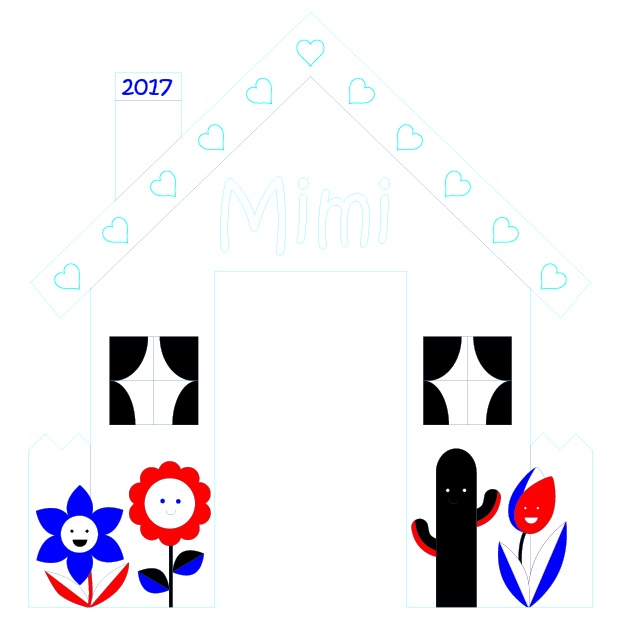
Next, we were off to Boston Makers, the non-profit makerspace in Jamaica Plains where we volunteer! Its laser cutter, 3D printers, and more are open to the community – let us know if you’re interested in dropping by! We imported our Adobe Illustrator file into Corel DRAW, which is the program the laser cutter utilizes to translate color (as above) to command. We selected 1/4” birch plywood for Mimi’s door. Here are a couple of 30-second videos of the laser cutter at work:
After cutting and engraving, we sanded the door to remove smoke stains from the laser cutting process. To prepare it for the outdoors, we sprayed it with two coats of Thompson’s WaterSeal Waterproofing Wood Protector. While at Boston Makers, we devised a way to mount Mimi’s door onto the balcony. Our solution was to design and 3D-print two C-hooks that would clamp the door to the bottom horizontal rung of the balcony. Here is a clip of the LulzBot as it is 3D-printing our C-hooks:
Back at home, we cut a Mimi-sized peephole from the wind barrier panel and slid the top of the house under the barrier’s fastener. The bottom of the house is held in place with the 3D-printed C-hooks. Here’s the final construction!
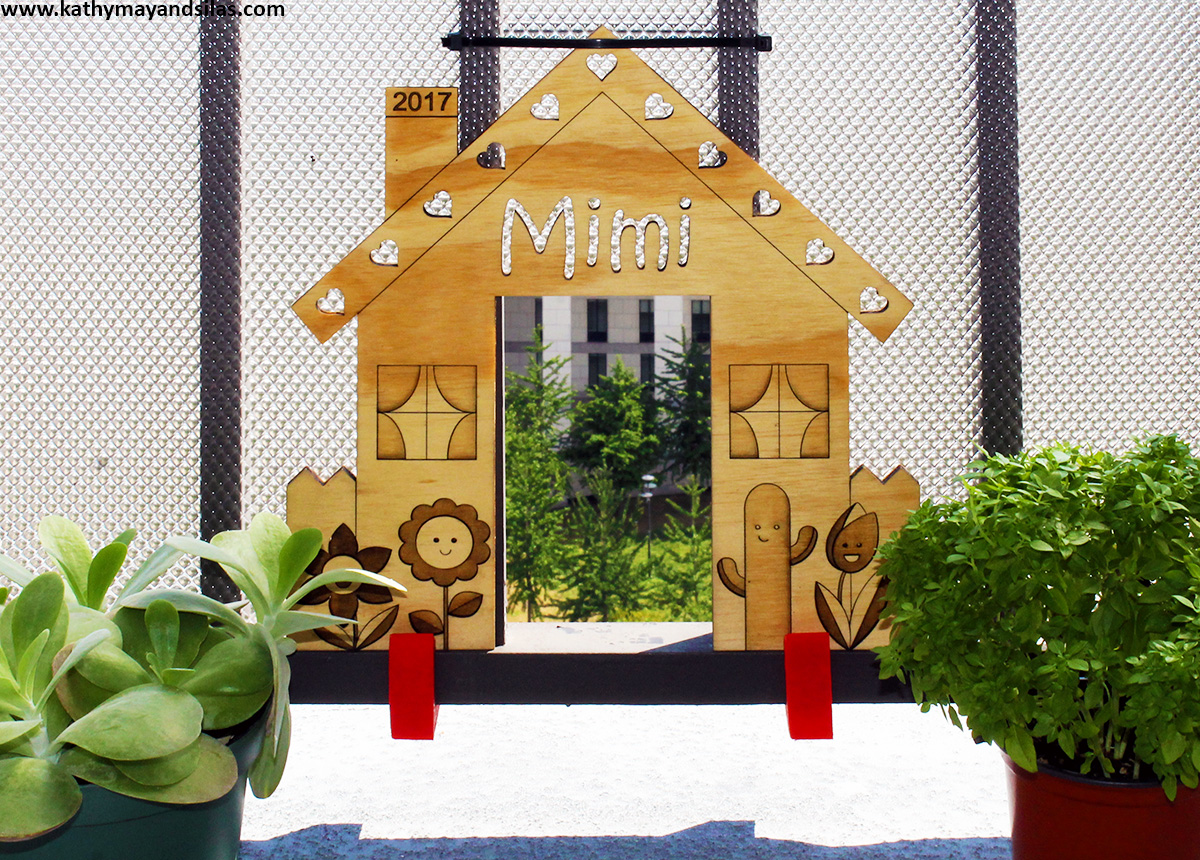
Mimi loves her new doggie door! She is again able to enjoy her view of the city below and to get a nice whiff of fresh air at her leisure! Click on the gallery images below to see some snapshots of her enjoying the balcony. By the way, we loved her door so much that we laser-cut a second copy to paint and display indoors. A picture of that is included in the gallery too!
Until next time,
Kathy May and Silas
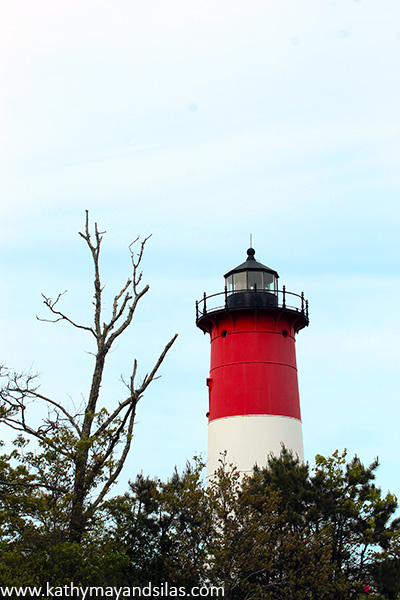
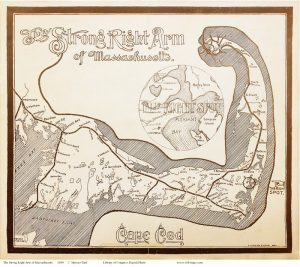
On a crisp May day, we and our good friends, Matt and Jocelyn, made a trek down to Cape Cod, or “the Cape,” as native Massachusettsans call it. In the tradition of the great American essayist Thoreau, the Cape is frequently described as an arm extending from the southeast corner of Massachusetts:
“Cape Cod is the bared and bended arm of Massachusetts. The shoulder is at Buzzard’s Bay; the elbow at Cape Mallebarre; the wrist at Truro; and the sandy fist at Provincetown.”
-Henry David Thoreau
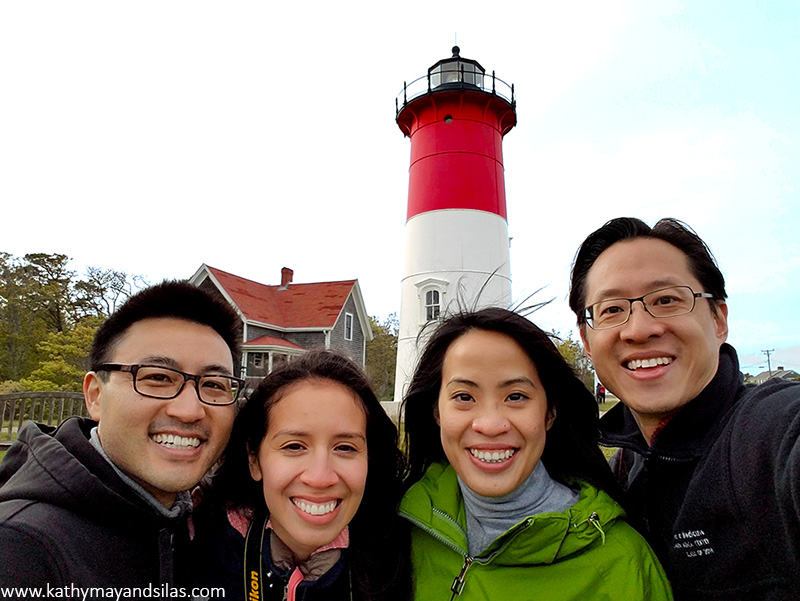
Our final stop was in the forearm of the Cape where, much to our surprise and delight, we came across a vaguely familiar red and white lighthouse! Do you recognize this national icon?
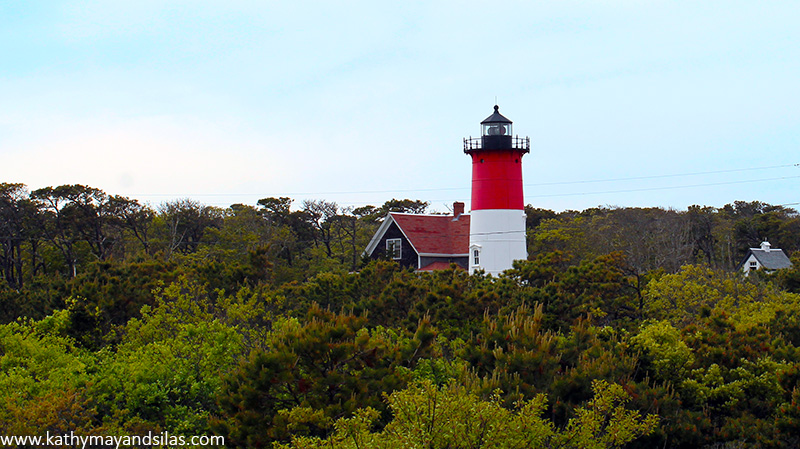
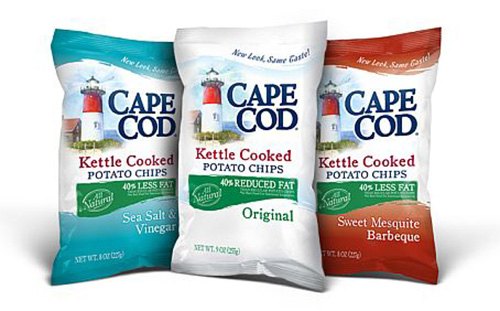
Yes! It’s the lighthouse featured on the bags of Cape Cod Potato Chips, the kettle-cooked American goodness that is made in Hyannis, right there on the Cape! If you are interested, please investigate Cape Code Potato Chip’s factory tour. We haven’t been ourselves but let us know if it’s worth a gander! We also spot the lighthouse every now and then on specialty Massachusetts license plates.
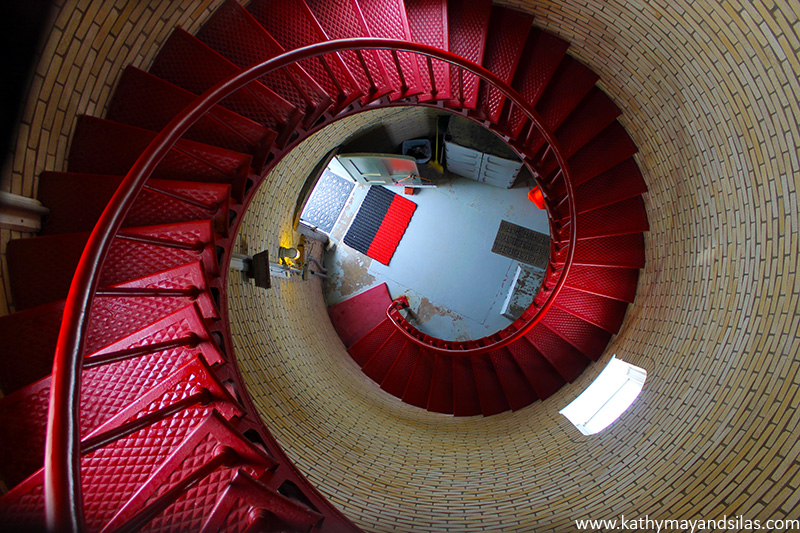
It’s called Nauset Light, and it’s one of the beautiful landmarks of the Northeast and of seafaring world in general. Since the first lighthouse, Pharos in the ancient city of Alexandria, lighthouses have provided warm lights to guide mariners through treacherous waters and acted as welcoming beacons to call travelers home. It’s no wonder that lighthouses have become a romantic symbol in our culture – a comforting brilliance in a lonely and dark world.
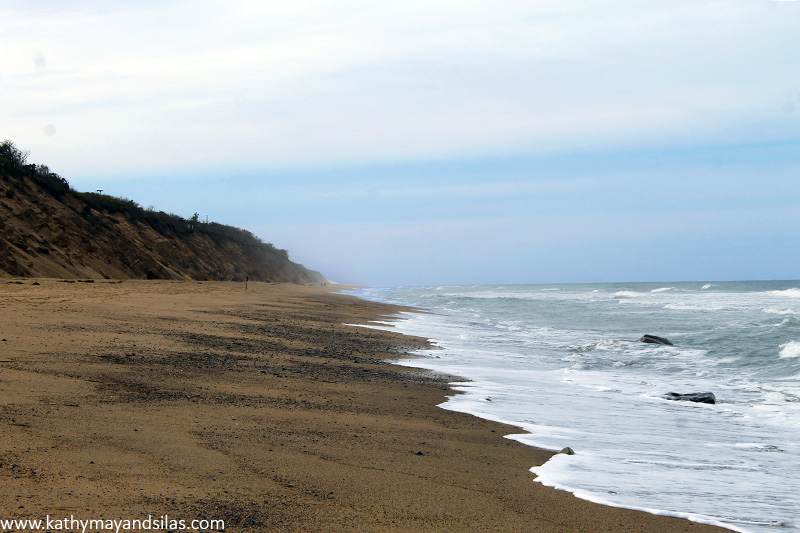
Nauset Light is actually one of a set of twins originally built in Chatham in 1877. The southern twin is still there today; the northern Nauset Light was moved to Eastham, where it replaced the beacon of the final of the Three Sisters, a bit more inland from the encroaching cliff edge. Through the years, the dangerously eroding seashore necessitated another move of Nauset Light, and in the future, another relocation will be required to prevent it from falling into the ocean. The Cape Cod coastline erodes at an astounding rate of approximately 3 to 6 feet per year, at worst 15 feet per year! With the combination of rising sea water level and natural erosion, there will come a time where Cape Cod will be no more! By the way, the Three Sisters Lighthouses, named so because from the sea they looked like ladies in white dresses with black hats, have quite a colorful and circuitous history. You can visit them on display, well away from the shore, within walking distance of Nauset Light, also on the Cape Cod National Seashore.
Every lighthouse has a “signature,” a set of characteristics so that mariners may identify land and location. Nauset Light’s two rotating aero beacons shine alternating red and white flashes with 5 second intervals between them. In the 1940s it was painted its distinctive red and white as a daytime indicator.
Being the emblem of Cape Cod potato chips makes Nauset Light memorable, but we look forward to visiting the 15 other spectacular lighthouses on Cape Cod. Are there any you recommend? Please let us know!
Until next time,
Kathy May and Silas
Resources:
National Park Service: Cape Cod National Seashore Lighthouses
Nauset Lighthouse Preservation Society
