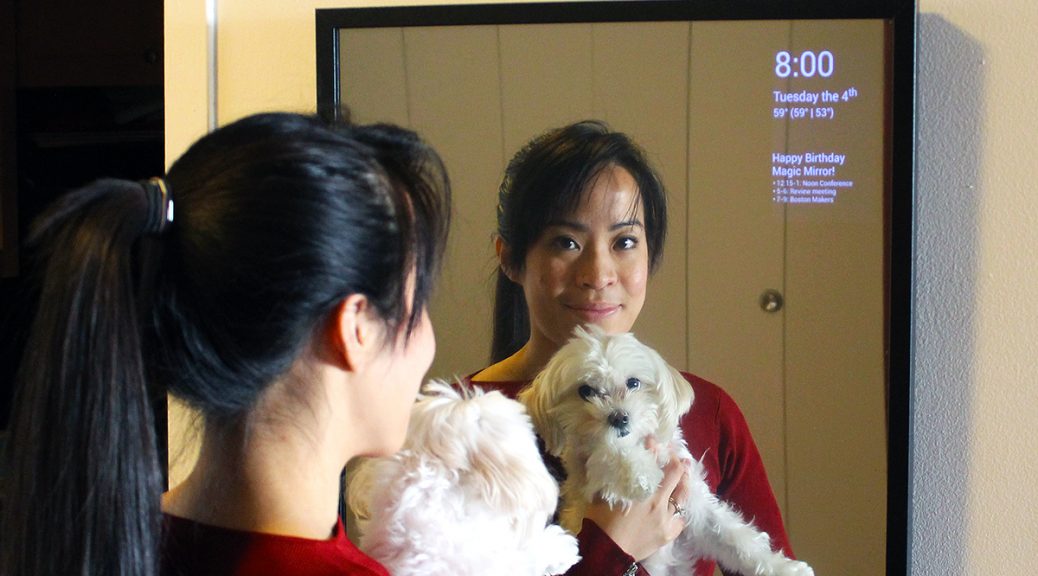
This is part one of our latest home automation project. We all check ourselves in the mirror on our way out of our home. What if, in addition to showing us our appearance, the mirror also showed us some important information about the world into which we are about to head? Sure, we could always check our phone or computer as we head out, but putting information in a place where we are already looking ensures that we don’t miss a thing. A smart mirror shows us not only our reflection but also relevant information superimposed on the image – like a heads-up display! We saw some smart mirror projects that other DIYers had made and decided to build one for ourselves! We have a lot of ideas for functionality but we first wanted to build a working system as quickly and cheaply as possible to serve as a proof of concept so that we could better understand how it works and what issues we would have to consider. It turns out our first smart mirror, though simple and straightforward, is a quick DIY that has already made our daily routine more efficient!
The basic concept behind how the smart mirror works is that the one-way mirrored glass allows light coming from behind the glass to shine through but is reflective like a regular mirror wherever it is dark behind the glass. The tablet would display white letters on a black background so that the tablet itself would be as invisible as possible but the text would appear to be floating on the mirror.
We decided that the best combination of fast and cheap would be to apply mirrored window film to a picture frame and to use an old Android tablet for the display. These are the materials that we used:
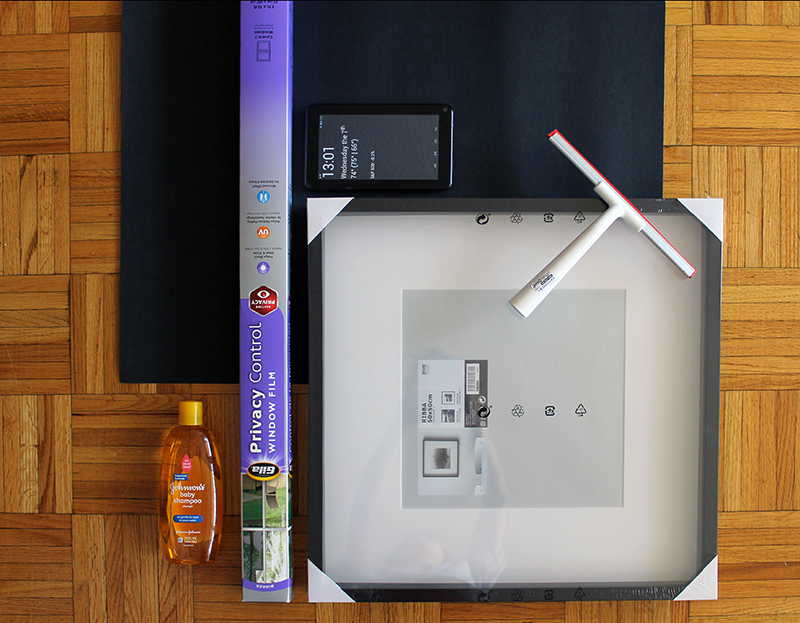
- Picture frame. You should choose a glass frame with a depth sufficient to contain your tablet and cord. We used a black IKEA RIBBA frame, 19.75” square (50cm square), $14.99.
- Mirrored window film. We decided on Gila privacy film, which we purchased on Amazon for $26. For other brands, variable opacities are available. One roll is plenty to make many mirrors.
- Baby shampoo and spray bottle. This is for the solution you will use in the application of film to the glass.
- Squeegee. We bought ours at IKEA with the frame for $1.99.
- Black posterboard. The backing which will accentuate the reflection of your mirror.
- Utility knife. To trim your film.
- Tablet. We used an old Android tablet which we no longer use. It’s an Azpen tablet which we bought at Micro Center years ago for about $30.
- Mirror app. Two apps that have been made available through Google Play by their authors are Wall Mirror and Home Mirror. Another app that is not on the app store but can be installed directly is Speculum.
An alternative to using mirrored film on glass to create your mirror is to use acrylic or glass that is one-way mirrored (also known as two-way mirrored), which would replace the glass in your picture frame. These can be bought locally if you have a shop nearby or ordered over the Internet for delivery. Either way, they can be cut to order. A disadvantage of acrylic, however, is warping which is especially evident in larger sheets. Both mirrored acrylic and glass are expensive; a sheet of mirrored acrylic for a project comparable to ours would be around $65. We decided to go with film on glass, which is significantly cheaper, especially since the glass comes with the frame. Disadvantages include the patience and attention to detail required to apply the film evenly without bubbles or bumps. If you already have experience applying window film to your house or car, it should be easy. Otherwise, be sure to watch a video to learn the technique so that you have good results.
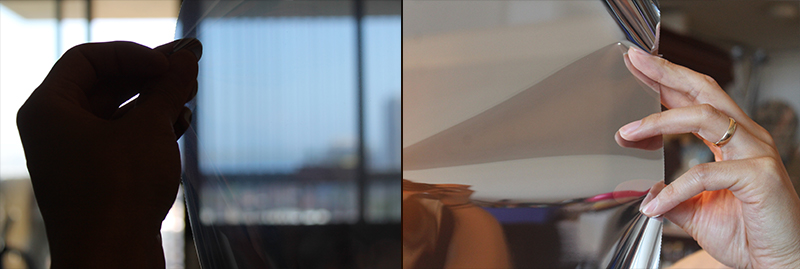
The mirrored window film is translucent when viewed from dark-to-light; it is opaque and reflective when viewed light-to-dark.
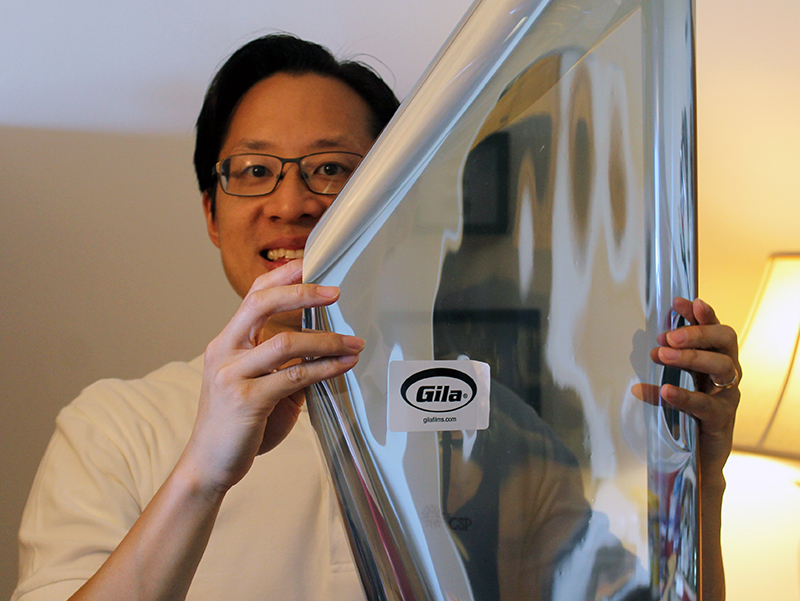
Cut the mirrored window film to the size of your frame, with at least an inch to spare on every side. An easy shortcut is to put the glass (or matting, if you have it) onto the sheet as a quick guide. The film will be trimmed; your cuts do not have to be straight.

Get ready for the application of film to glass. There is water involved! We put a garbage bag down to contain the mess. Also, do this in as dust-free an environment as you can find. Even miniscule particles and fuzz will show between the film and glass.

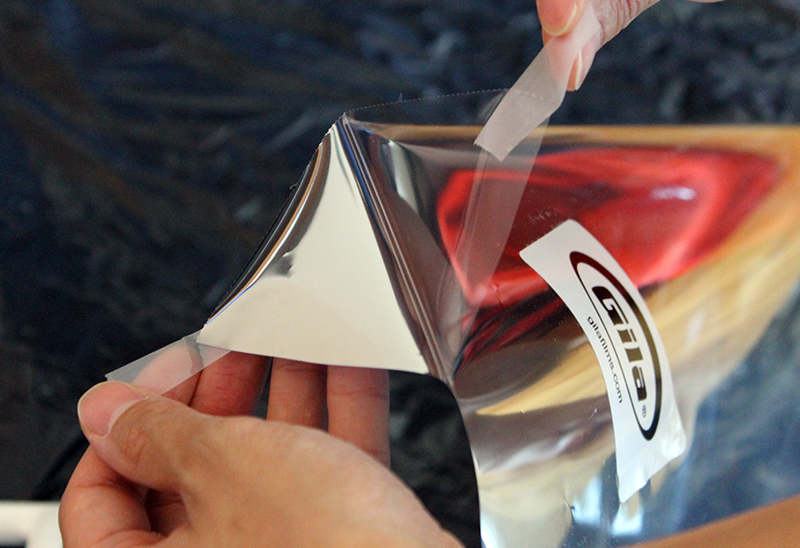
A great tip we learned that will certainly applicable to other projects is from Gila’s website: Apply scotch tape to the film side and the liner side for easy, quick separation without damaging the film.
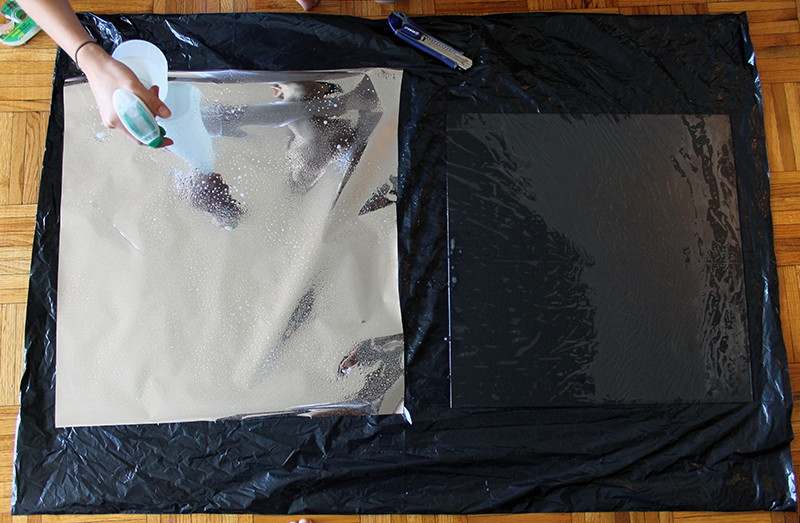
Make your application solution in a spray bottle. Mix 1 quart of water with 1/2 cap of baby shampoo. Lay down your film with the side previously abutting the liner facing upwards. Lay down your glass alongside. Spray the solution onto both of these surfaces – be generous.
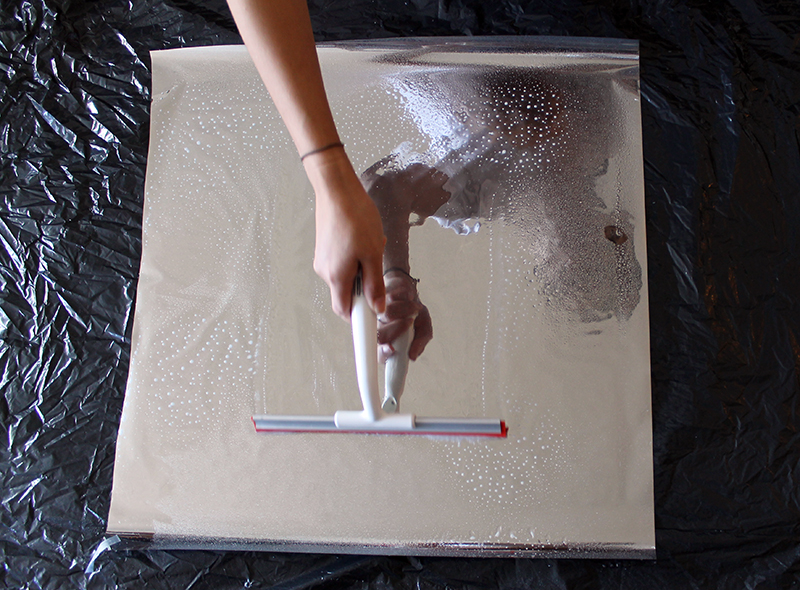
Apply film to the glass with the side of the film previously against the liner now against the glass. The two wet sides creates surface tension to hold the film to the glass. Next, spray the dry surface of the film – again, be generous. Use your squeegee to smooth out the film over the glass, removing wrinkles and bubbles as you see them. This works much better than trying to apply film dry! If you see any particles, you can lift the film to remove them and then continue.
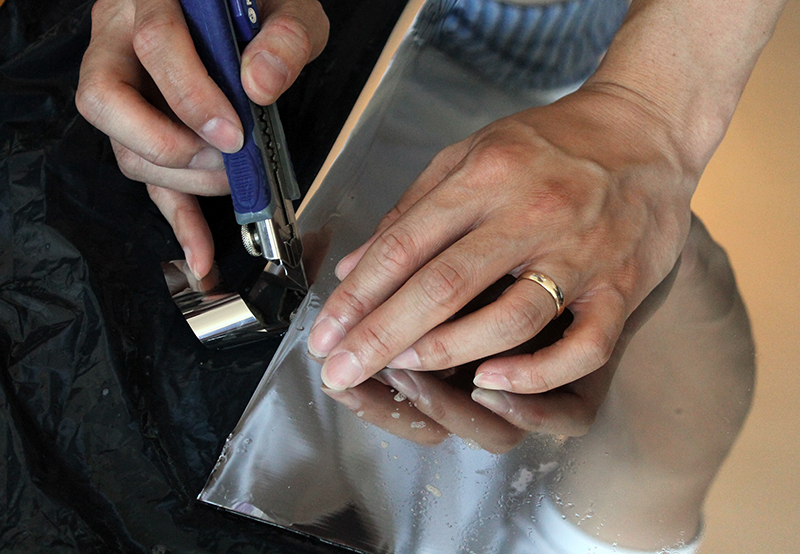
Trim the edges of the film by cutting along the perimeter of the glass with your utility knife. Use the edge of the glass itself as the guide. Try to be precise, because if you have excess film, it can lift up when you place the glass into the frame.
Next, in one corner of your black posterboard, cut a window that is the size of your tablet screen. The black against the mirrored window film will emphasize its reflective quality. Then construct some cardboard pieces to support the tablet and keep it in place. An alternative would be to tape the tablet in place but that makes it difficult to remove the tablet to make changes. After you’ve done this, it’s time to assemble your mirror! Place your film-covered glass into the frame (glass will be the outside; film will be the inside). Next goes your black posterboard and then the tablet, face-down, followed by the cardboard support and the backing for the frame.
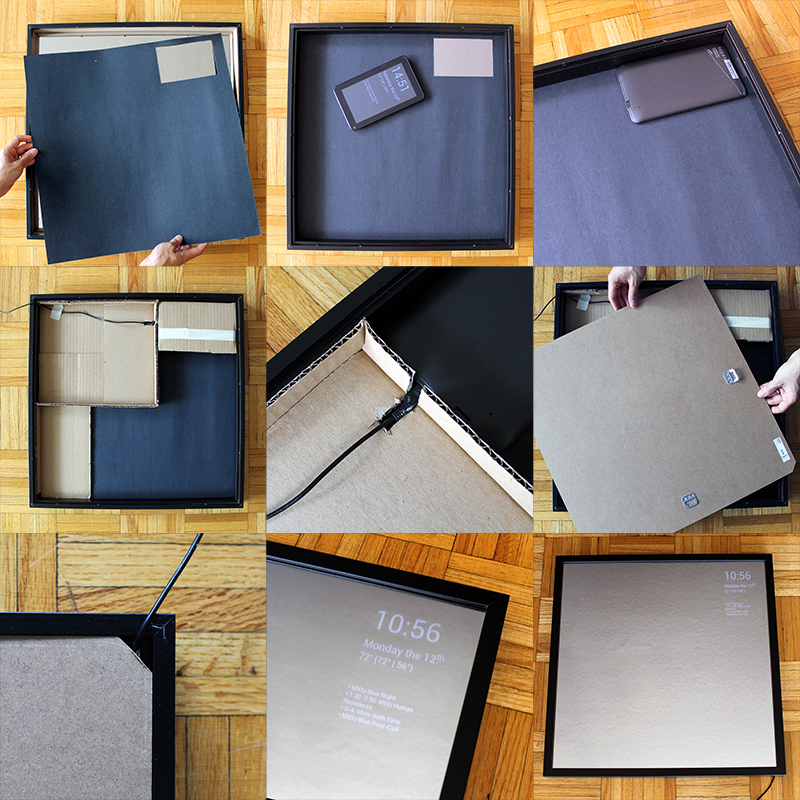
We cut a hole in the cardboard for the tablet’s AC adapter cord to run; we also cut a corner of the frame’s backing for the same reason.
There are various options for the information display. We decided to use an app called Wall Mirror that Nick Hall wrote for his own smart mirror. It is available through the Google Play store and has an easy-to-use configuration tool to customize the display. You can see in the photos that we are using the time, date, weather, birthday, and calendar modules. This needs to be set up before putting the tablet into the frame. Since we didn’t tape down the tablet, however, it is very easy to remove the table to make changes. Using a premade app is the quickest way to getting the smart mirror up and running, and it requires no coding. Alternatives to using a premade app might be to write a custom app or to use a website displayed in a full-screen browser. Alternatives to using a tablet might be to use a Raspberry Pi or other miniature computer with a monitor.
In fact, now that we have the basic smart mirror working, we plan to upgrade it and build a more customized version. In order to accommodate the functionality we have in mind, we will look into using a Raspberry Pi with a monitor. Some ideas that may possibly make it into the project include:
- More detailed calendar and weather information
- Motion or proximity detection to turn off the screen when nobody’s looking
- Face recognition using a camera, so that the display is customized depending on who’s in front of the mirror
- Voice commands, for example to show more detailed information or to perform Google/Alexa/Cortana searches
Stay tuned for more posts as we build the next version of our Magic Mirror! Please let us know if you have built something similar or if you have any suggestions for us!
Until next time,
Kathy May and Silas
PS. Here are some of the tablet smart mirror projects from which we drew inspiration:
- Adafruit tutorial including video
- Jesstalk (YouTube video)
- Nick Hall’s Wall Mirror
- Hannah Mittelstaedt’s Home Mirror
- Nicolas Mora
- Sha Alibhai
- Niels Masdorp’s Speculum

This is really neat!
You are blowing my damn mind right now.