Click here to watch our DIY doggie wrap in action – featuring Mimi!
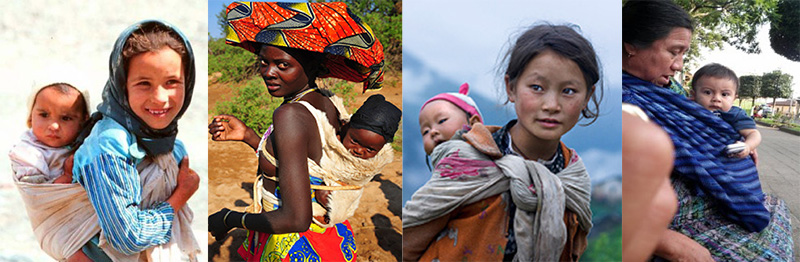
Mothers hailing from different cultures on every continent have been “wearing” babies upon their own bodies for centuries. Traditionally, baby-wearing is a convenient and pragmatic method to keep track of little ones, while continuing activities of daily life and maintaining the intimacy of mother and child.
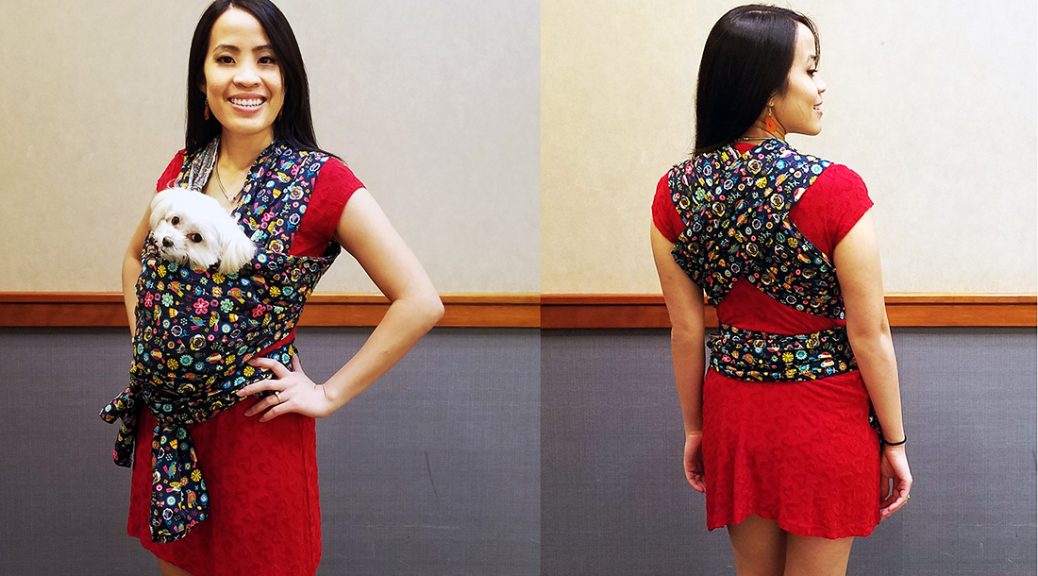
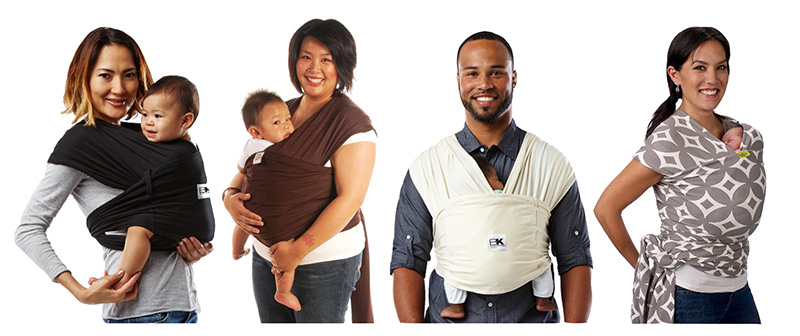
Nowadays in North America, baby-carrying cloths are trendy accessories that are marketed under brands like Moby Wrap, Boba Wrap, and Baby K’Tan. But why limit baby-wearing slings, wraps, and carriers to human babies? We decided to make our own wrap… for our pup Mimi!
The idea actually began during our hikes. Mimi is thrilled to scramble up rocks and down paths but, as every one of our human strides is ten of her Maltese steps (times four paws), she tuckers out! We made our own wrap, so that we can carry Mimi during strenuous portions of the trek. The wrap started out as a silly but actually has turned into a very pragmatic piece of equipment! Here is our incredibly simple and quick project – you can make one too!
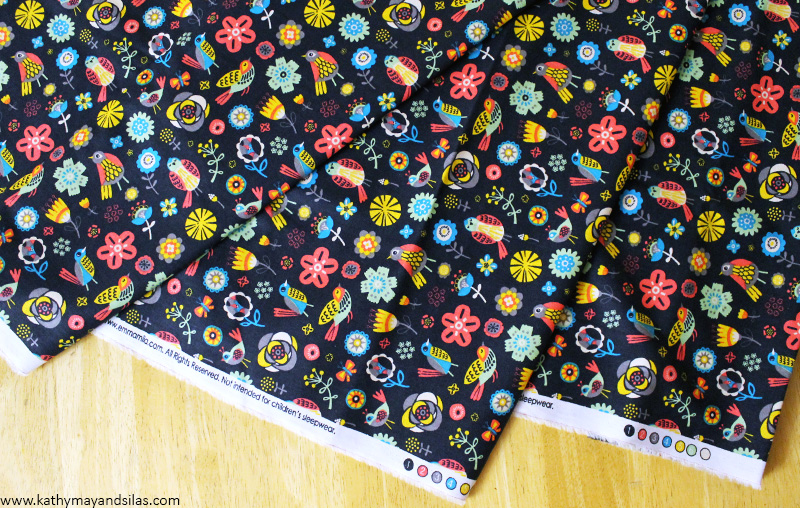
1. Select 2.5y (90”) of cloth. Our choice was a whimsical folk pattern of quirky birds and playful flowers. This is a 100% cotton fabric that is strong enough to support Mimi’s weight. Ffun fact: Her weight is less than that of most newborns! This fabric also has just a little bit of elasticity for our comfort and for hers. Finally, it is conveniently machine-washable.
2. Cut the cloth length-wise. Most bolts of fabric are either 45” or 60”. If your original bolt is 45” in width, then halve the fabric lengthwise to make two rectangles sized 22.5”x90”; if your bolt is 60” in width, then halve it to make two rectangles sized 30”x90”.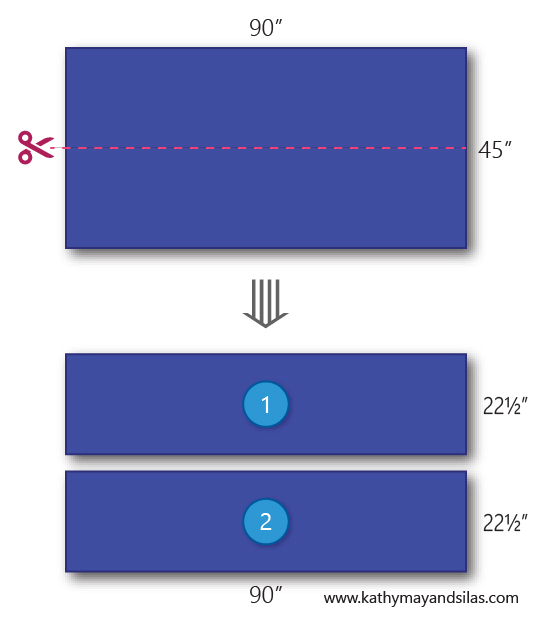
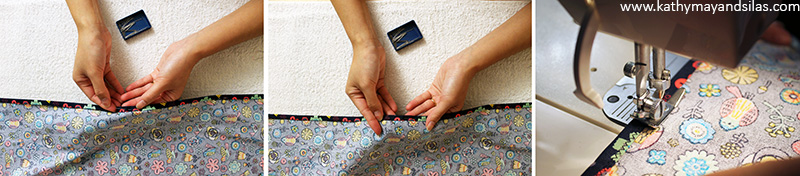
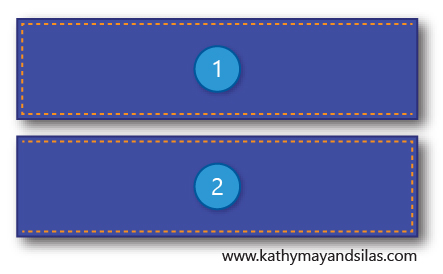
3. Fold and iron the edges of both long sides and one short side of each cloth. This is to prepare the hem of your cloth. Fold the edge of the cloth by less than a centimeter then iron flat. Then, re-fold the edge by less than a centimeter again, and then iron flat.

4. Pin the three folded edges on each piece of cloth and then sew them. Pin the edges that you have ironed flat, so that you may easily sew them. This is the final part of hemming your cloth. You can do this by hand or with a sewing machine. We used the latter, given to us by Kathy May’s mom. We opted for a zig-zag stitch rather than a straight stitch so that it could stretch with the fabric!
5. Join your cloths by creating a flat-felled seam between the two short un-hemmed sides. A flat-felled seam is a strong and durable seam, ideal for our wrap which would endure the stress of supporting a dog and frequent machine washes. It also encases both raw edges for a clean finish. Finally, it is completely flat for our comfort and Mimi’s.
Here is a cross-section schematic of what the flat-felled seam is:
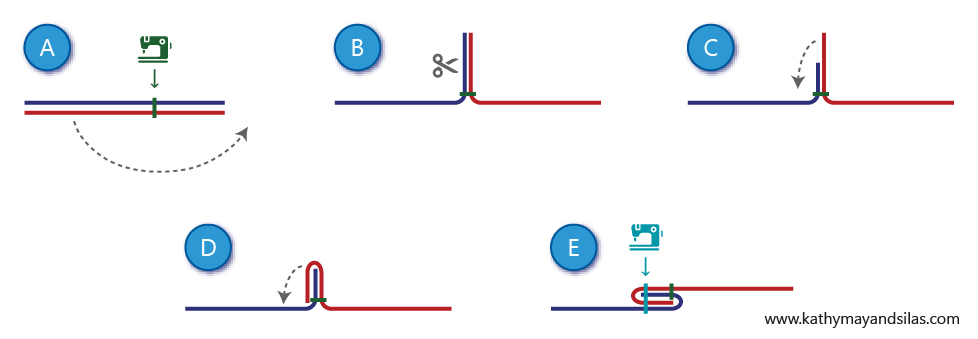
This short and easy-to-follow video taught us how to create this professional-looking seam.
6. Wrap your dog! There are a number of ways to wrap your dog (or baby) on your chest or on your back, but we have found the easiest is the method recommended by the popular Moby Wrap and Boba Wrap. See our quick how-to video, featuring the one-and-only Mimi! Music credit: “The Printed Word” by David Hilowitz.
As you can see, the doggie wrap is essentially a very long piece of cloth with finished edges! We spent just a few dollars on this project with the purchase of the fabric, rather than spending $50+ on a designer baby wrap! Our doggie wrap can be folded and stashed into our bag, or tied around our waist, only to be whipped out when Mimi starts to tire. From the first use, she loves the doggie wrap! As you can see from the video, she jumps up happily to be placed into the wrap and enjoys being carried. Once she’s inside, she relaxes and enjoys the scenery. We hope that you make one of these adorable and pragmatic wraps for your pup (or maybe your baby)! Let us know what you think in the comments below!
Until next time,
Kathy May and Silas


This looks good just like a baby carrier. I love it!
I had a baby wrap for all 4 of my human babies. Now I am making one for my kitten baby. Thanks for the diy in helping me put it together
Thank you!
I wish I could add a photo of how it turned out.
Thank you for your comment! I hope you and your dog (or baby) enjoy it!