VISIT ALL THE POSTS IN OUR 3D ORIGAMI HOW-TO SERIES!
3D Origami: Introduction
3D Origami: Part 1 – Fold the Component Pieces
3D Origami: Part 2 – Make a Ring Base
3D Origami: Part 3 – Coming Soon!
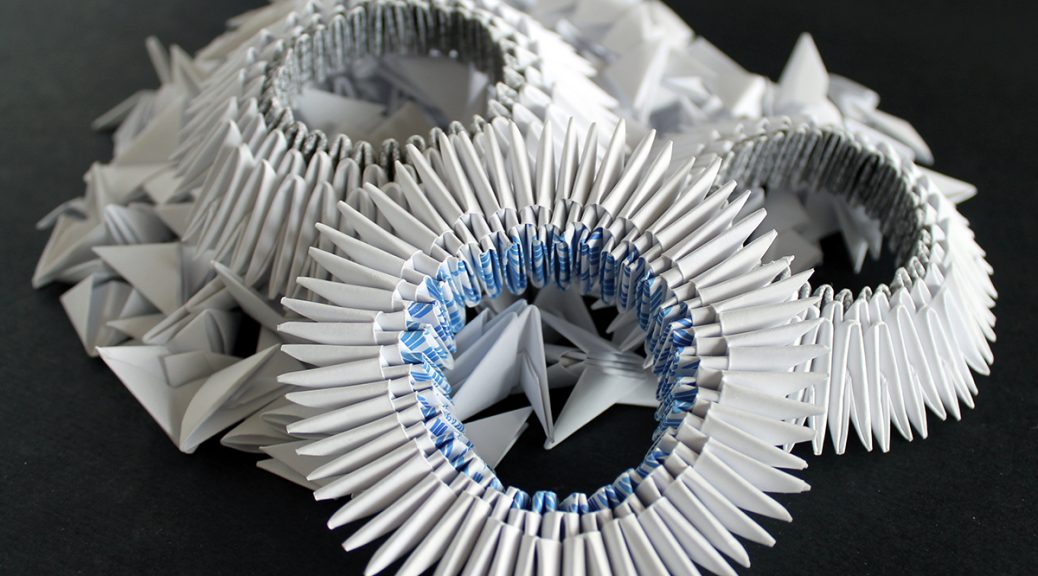
3D ORIGAMI: PART 2 – CREATE THE RING BASE
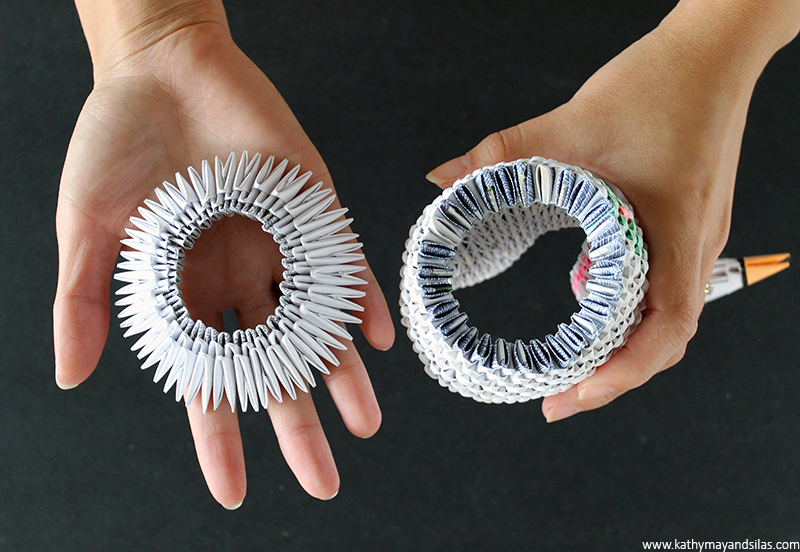
Now that you have made a large pile of triangular component pieces (see “Part 1: Fold the Component Pieces“), we can start to build a ring base! A ring base is a versatile foundation for any 3D origami creation. On the left is a ring base alone; on the right is a ring base as the foundation of a 3D origami swan.
In this tutorial, we will make a ring base of 30 component pieces. Please note that you may alter the number of component pieces in your ring base to make larger or smaller 3D origami creations. Shall we begin?
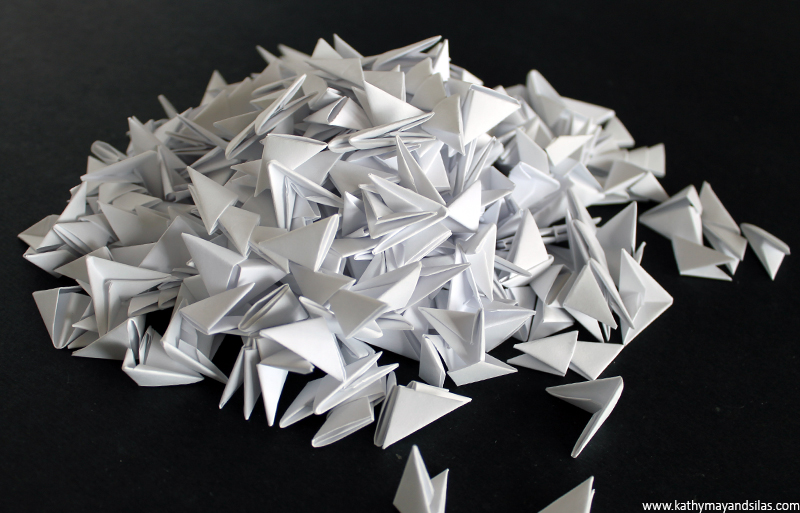
1. First, make sure you have a sufficient number of component pieces. For a ring base of 30, you will require 60 component pieces for the base itself. Of course, you should make extra for the rest of your origami sculpture.
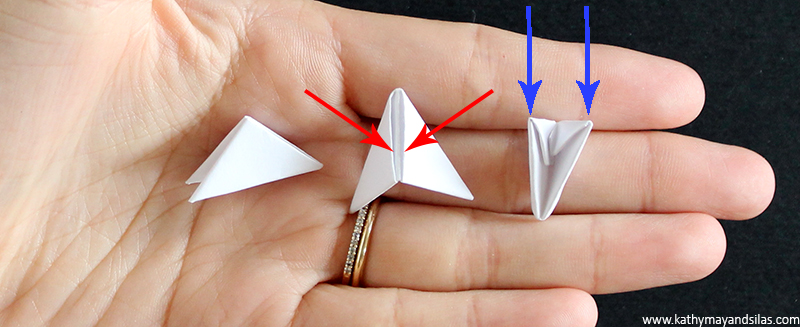
2. Note that each component piece is a right triangle. One leg of the right triangle has two “pockets” (red arrows) while the other leg has two “wings” (blue arrows).
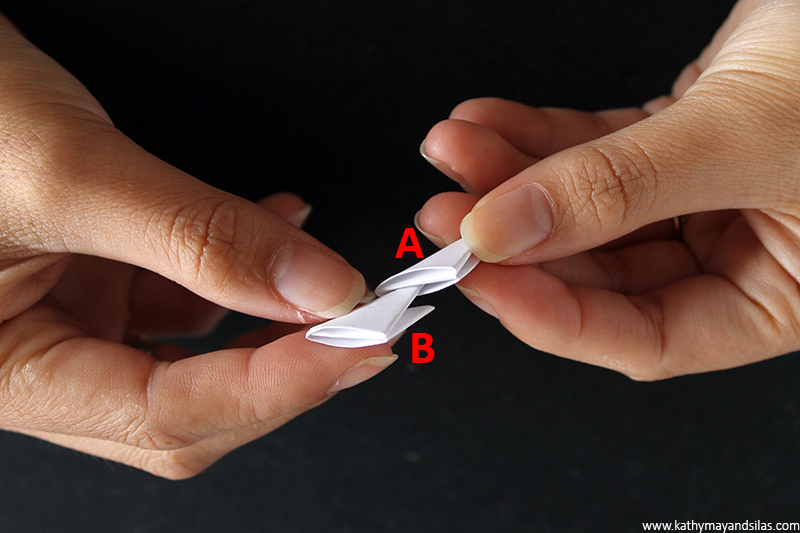
3. Insert the left wing of one component piece (B) into the right pocket of another component piece (A). Make sure that the component pieces are facing the same direction (i.e., that the right triangle component pieces are parallel).
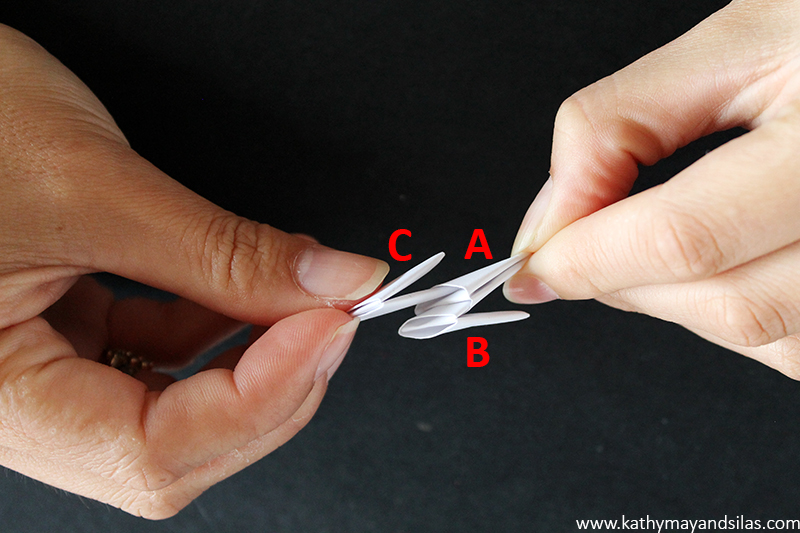
4. Then insert the right wing of a new component piece (C) into the other pocket (A).
Here’s what your 3-component-piece unit should look like from the front and back, front and side.
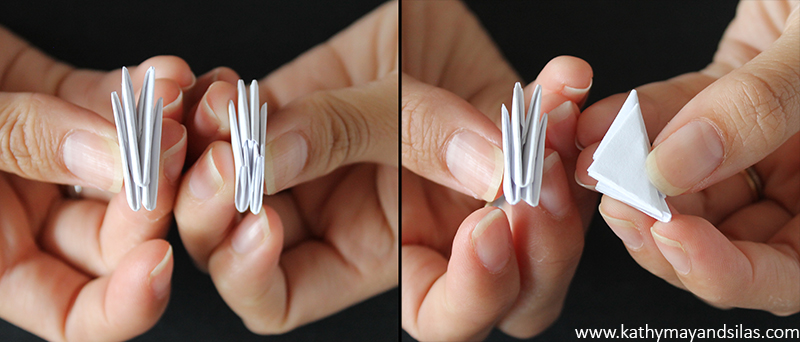
5. Repeat Steps 3 and 4 with new component pieces until you have 15 sets of 3-component-piece units.
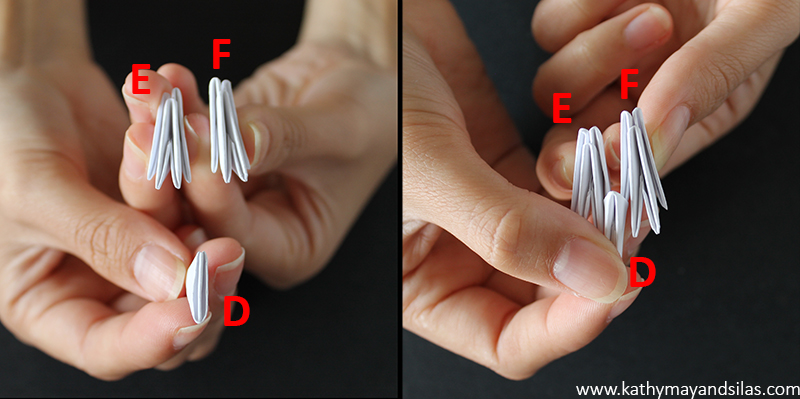
6. Hold 2 sets of your 3-component-piece units (E & F) side-by-side. Take a new component piece (D) to join these 2 sets together. The right-most wing of E should go into the left pocket of D; the left-most wing of F should go into the right pocket of D.
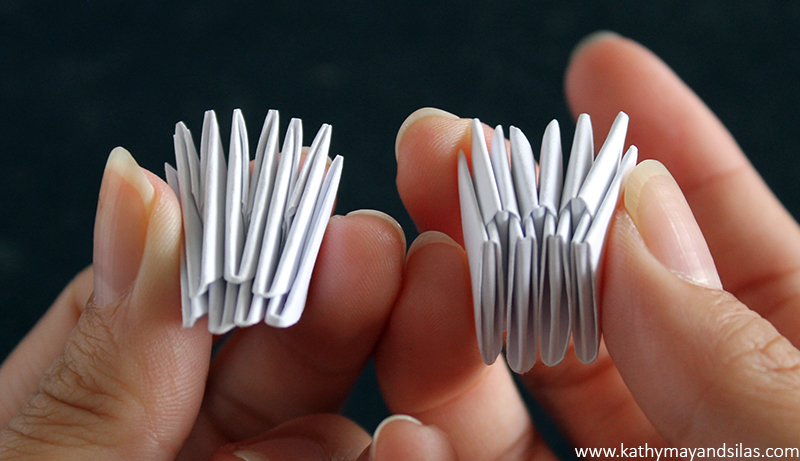
Now you have created a 7-component-piece unit. Here’s what it should look like from the front and back.
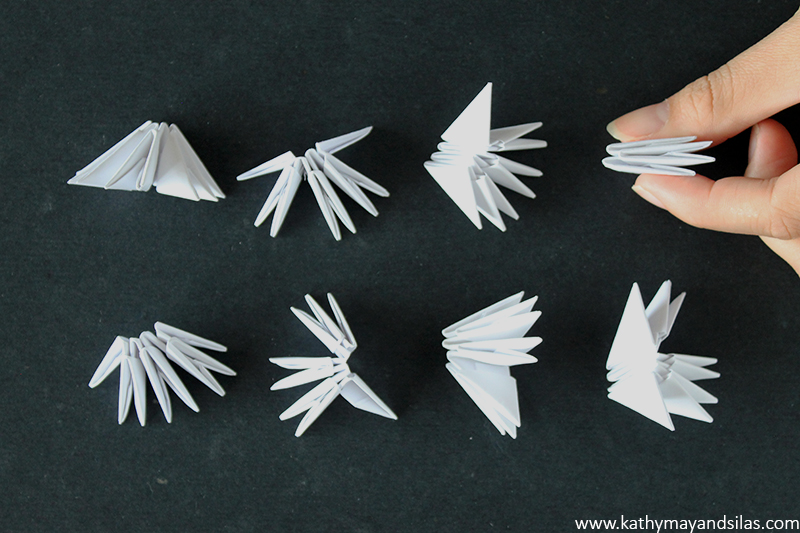
7. Repeat Step 5 until you have 7 sets of 7-component-piece units. Since we have an odd number, the 8th set will be a 3-component-piece-unit, which I’m holding in the picture.
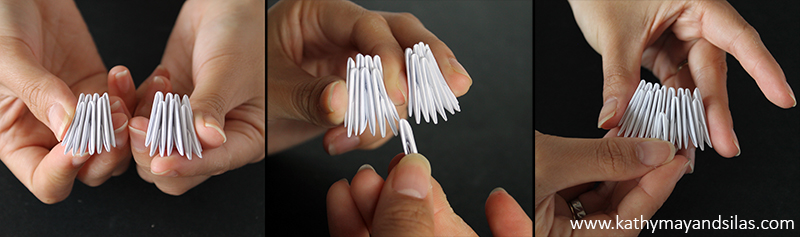
8. Hold 2 sets of 7-component-piece units side-by-side. Take a new single component piece to join these 2 units together. This is analagous to the previous step – you’ve got the hang of it! We are assembling these in smaller units because assembling a long chain becomes unwieldy!
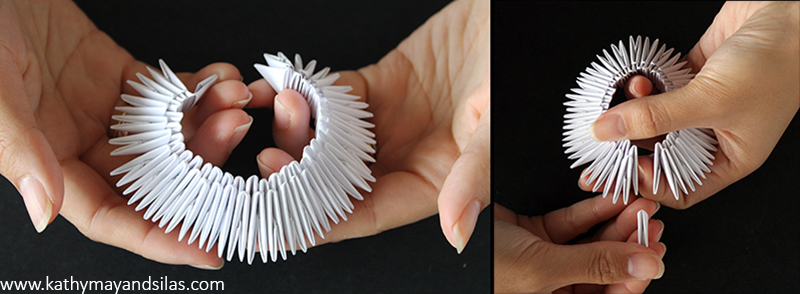
9. Continue joining sets until you’ve made a semicircle. Make this a complete circle by using your final single component piece to join together the wings on either side of the semicircle.
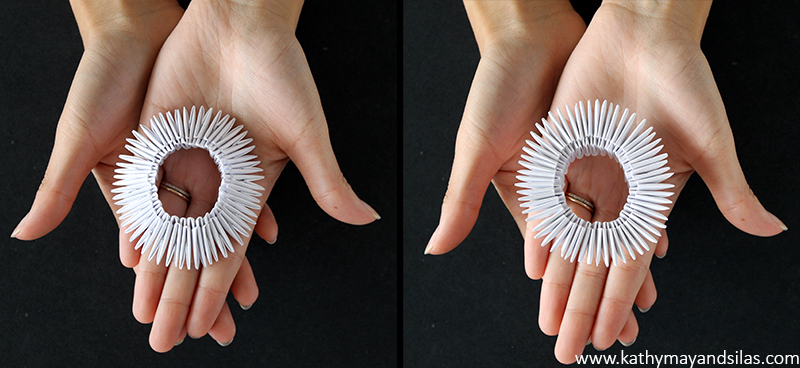
10. There you have it – you’re done! You’ve made a ring base of 30. It should feel sturdy at this point, not requiring glue. You can tighten it (but not too much, please) by pushing the outer layer into the inner layer of component pieces. As we add more layers later, the structure will be further strengthened. Here is a view of the top and bottom of your completed ring base.
The entire process of modular origami is very simple once you have learned the basics. Here are a couple of images to help with troubleshooting. If you have any questions, please leave me a comment below and I’ll be happy to help!
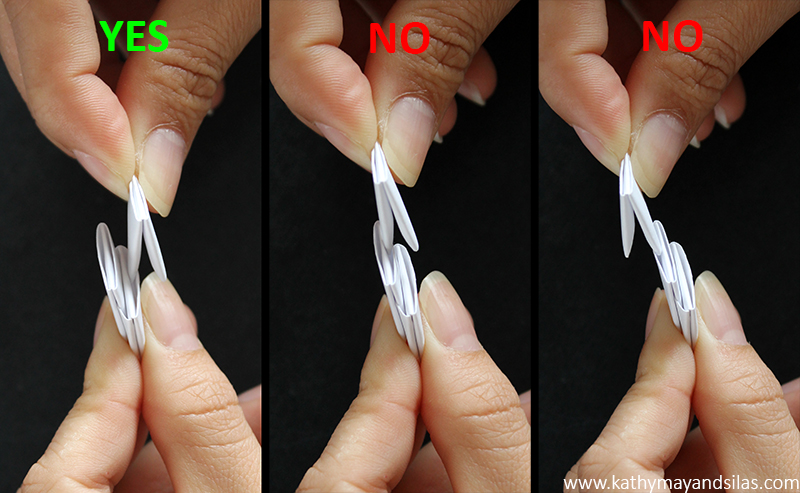
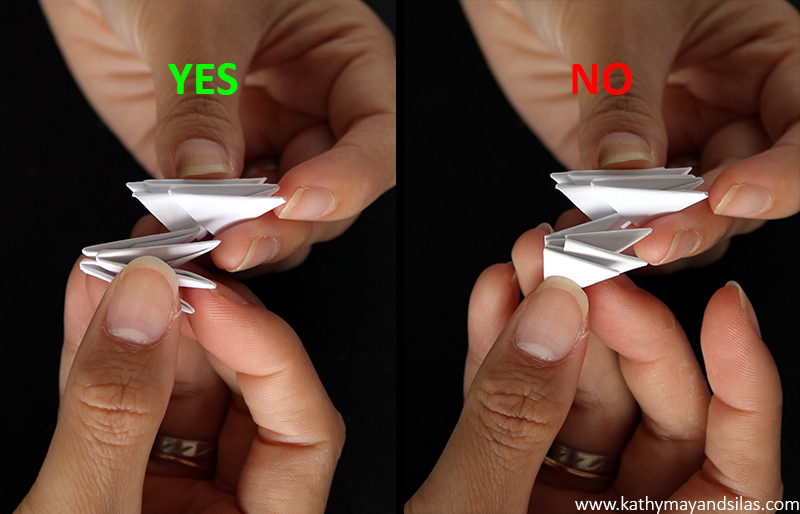
Troubleshooting #1: Make sure that the correct wing of your component piece goes into the correct pocket of another component piece.
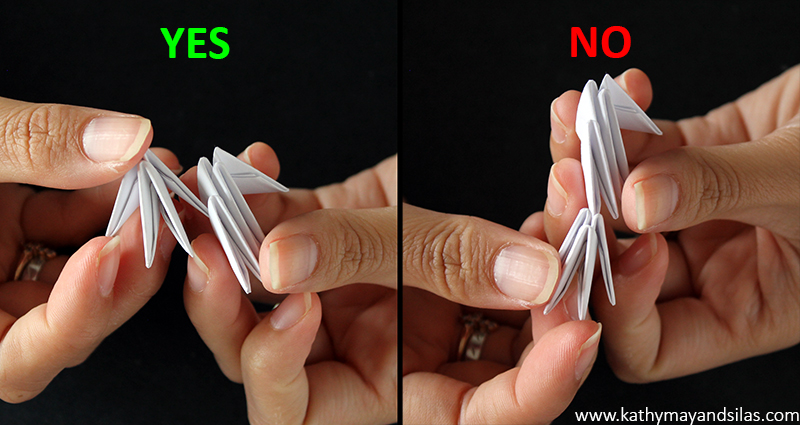
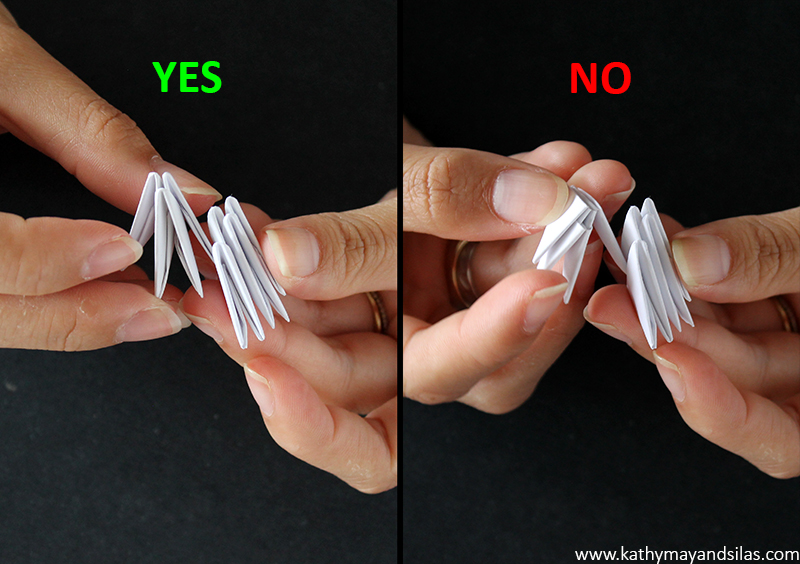
Troubleshooting #2: Make sure that all of your component pieces are facing the same direction (i.e., all hypotenuses of all component pieces should be parallel).
Congratulations on making your 3D origami ring base. Hopefully you made many more than 60 component pieces so that we can go onto Part 3. Stay tuned – happy folding!
Until next time,
Kathy May and Silas
VISIT ALL THE POSTS IN OUR 3D ORIGAMI HOW-TO SERIES!
3D Origami: Introduction
3D Origami: Part 1 – Fold the Component Pieces
3D Origami: Part 2 – Make a Ring Base
3D Origami: Part 3 – Coming Soon!


Awesome Kathy …… will definitely try.
When will Part 3 and subsequent, if any, be out ????? Really can’t wait !!!!!!
Part 3 will be coming soon! Stay tuned! We will probably make a swan, as that is a basic but beautiful origami sculpture. Let me or Silas know if you have questions or requests!
Hi.. I tried creating this. Actually instead of getting the exact mesauremnts of each piece.. some of my pieces were a little here and there unequal. So I was not able to get a perfect ring. So does this matter? Each piece of paper should be of exactly same measurements ???
Hello Anumeha!
Thank you for your message! I’m sorry I received it late due to the holiday season! Imperfections are an inevitability due to (1) the quality of the paper, (2) slight differences in the folding process, and (3) how tightly the component pieces are joined. Don’t worry if your ring base is a little unequal. As you continue to build your origami sculpture, the imperfections will be masked. That being said, here are a few ways to make as uniform a structure as possible:
1. Quality of the paper: We try to use miscellaneous recycled papers from different sources in an attempt to reduce, reuse, and recycle. Oftentimes, the heaviness or weight of paper can be variable. This is not a problem as long as they are evenly mixed – just make a big box of component pieces, toss them together, and you will not be able to tell the difference in the end! If you choose to use a single type of paper, however, then stick to it. Don’t make a few layers out of light paper and then switch to heavy paper.
2. Differences in the folding process: Because many, many component pieces end up in your final sculpture, no single component piece, layer, or ring base will be perfect. Trust the process, continue folding, joining pieces, and making layers and the slight differences will even out. As you have more practice, each of these steps become easier and your technique will improve without your realizing.
3. Joining of the component pieces: THIS is the most important part of making your 3D origami equal and uniform! I will give you unfortunately vague advice – when you join your component pieces, don’t join them too tightly; don’t join them too loosely! You want to join them tightly enough so that you have a stable structure that does not require glue. However, joining them too tightly spreads apart the eventual layers, causes an unequal structure, and makes the end-result less aesthetically pleasing. This is truly something that must be learned with practice. Some types of paper are more slippery and require joining more tightly. Also, different people have different techniques (my mom and I join our pieces at different levels of tightness, though both end-products are acceptable in the end). Just practice and this will come with time!
I hope that this helps, Anumeha. Let me know if I can provide further clarification. I anticipate that these may be issues that you will encounter with the rest of your 3D origami sculpture beyond the ring base, which often is the most un-uniform part – but don’t worry! You’ll have a great product in the end. Good luck to you in your 3D origami. Once you have a completed creation, I would love to see it! Happy new year!
Until next time,
Kathy May