VISIT ALL THE POSTS IN OUR “PAPER FLOWERS” HOW-TO SERIES!
Paper Flowers: Introduction
Paper Flowers: Part 1 – Make the Petals
Paper Flowers: Part 2 – Coming soon….!
PAPER FLOWERS: PART 1 – MAKE THE PETALS
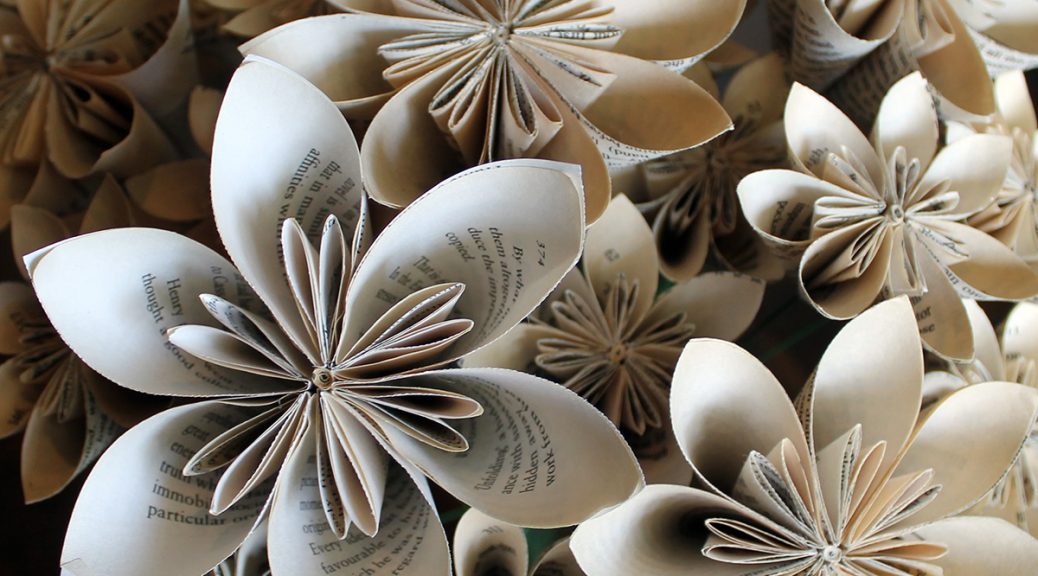
Years ago, my mom taught me how to make these paper flowers (click here to see some examples), and they have become one of my most favorite projects. My mom herself learned and perfected the technique so that she could make a bouquet for me and a boutonniere for Silas. Now it is my pleasure to share this paper-craft with you. My mom and I developed a number of variations for the paper flowers, which I will share in future posts. In this post, we’ll begin making a basic petal design. In the next post, we’ll assemble the petals into a complete flower.
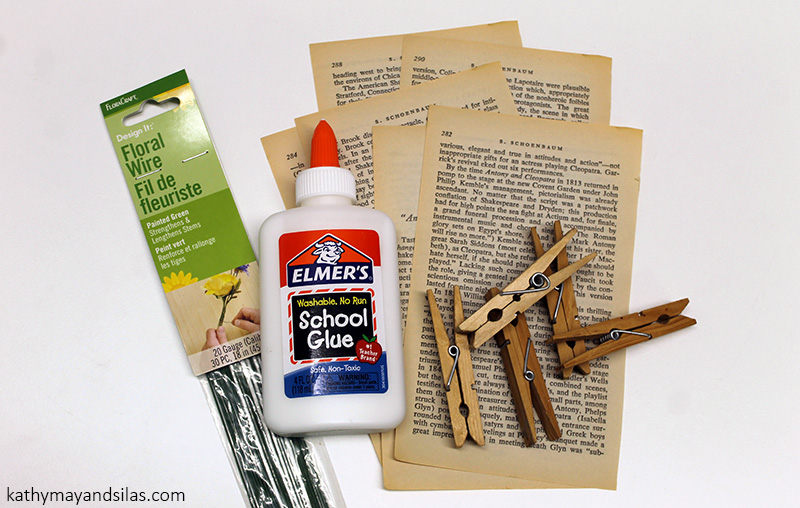
Step #1: Gather your materials.
- Paper – The weight of the paper affects the ease of the project (the lighter the easier), but you can use virtually any kind of regular paper. Naturally aged pages have a great deal of character. Other ideas are sheet music and wrapping paper.
- Floral stem wire – Choose a 16-18 gauge wire. A higher gauge will be too weak to support the weight of your paper flower.
- White glue – Any white glue will do.
- Clips – You can use anything you have on hand: clothespins, bobby pins, binder clips, etc.
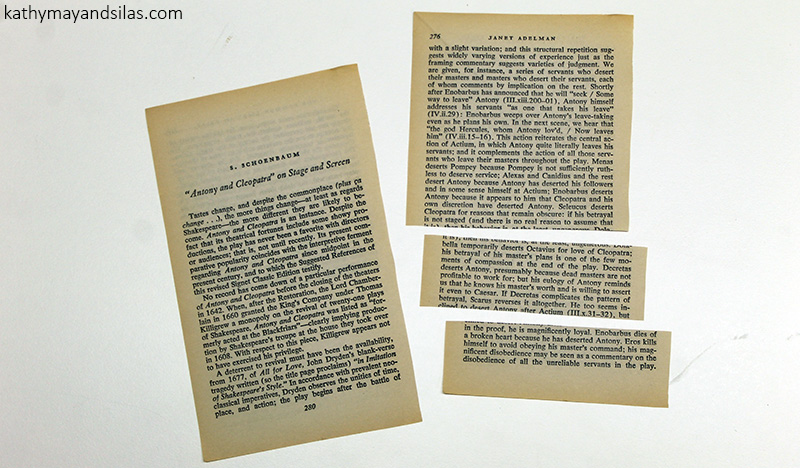
Step #2: Cut a square of paper. A typical paperback novel is the perfect size. If you cut a square out of a page, save the rest of the page for Part 2 of this project.
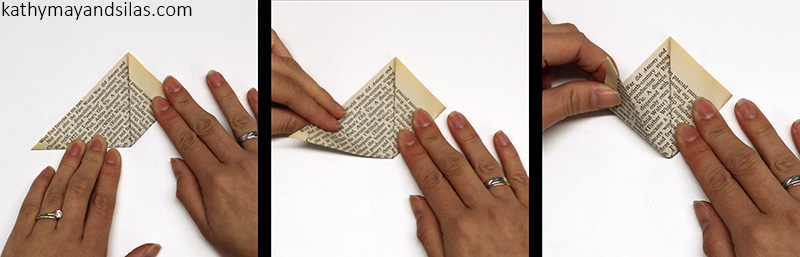
Step #3: Fold the square in half diagonally. Place the open side towards the top. Your folded paper should look like a triangle with the longest side on the bottom.
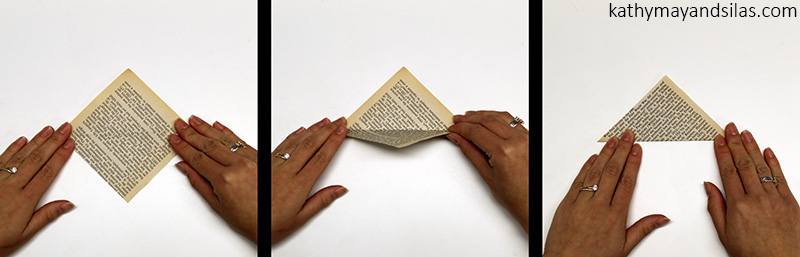
Step #4: Fold the right corner of the triangle to the center corner.

Repeat for the other side. Then place the open side towards the top. Your folded paper should now look like two triangles with their long sides touching, and the two triangles overlying a square.
Step #5: Fold down the long side of the right triangle to meet the short side of the triangle.
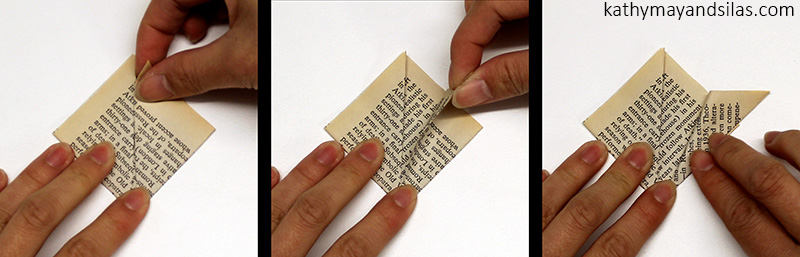
Repeat for the other side. Your folded paper should now look like a kite with two triangles emerging from the sides.
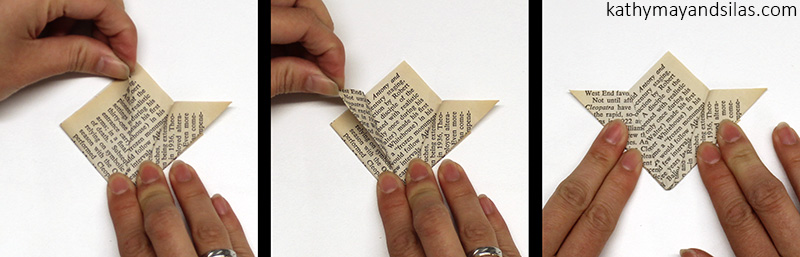
Step #6: Trim both side triangles to make them flush with the square underneath. Your folded paper should now look like a square that is made of a kite and two triangles. Position the triangles towards the bottom and the kite upright.
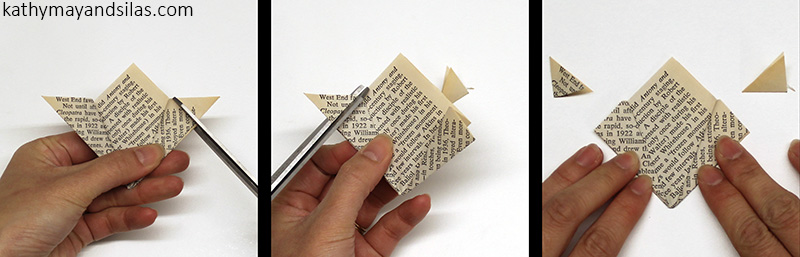
Step #7: Place glue along the bottom two sides of the square. Then lift the triangles and place glue along the bottom two sides of the square under the flaps of the triangle. Place the flaps of the triangles back down.
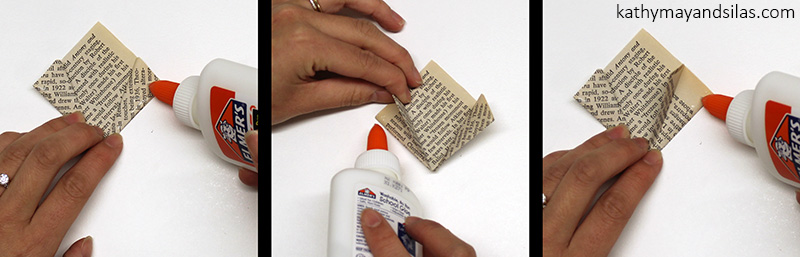
Step #8: Fold but do not crease the square vertically along the diagonal of the square. Make sure that you bring the faces of the two triangles together. Once again, make sure you do not crease along the fold.

Step #9: Secure the glued edges with a clip. Wait until the glue is dried, then remove the clip. Depending on the weight and quality of your paper, this should take just a few minutes.
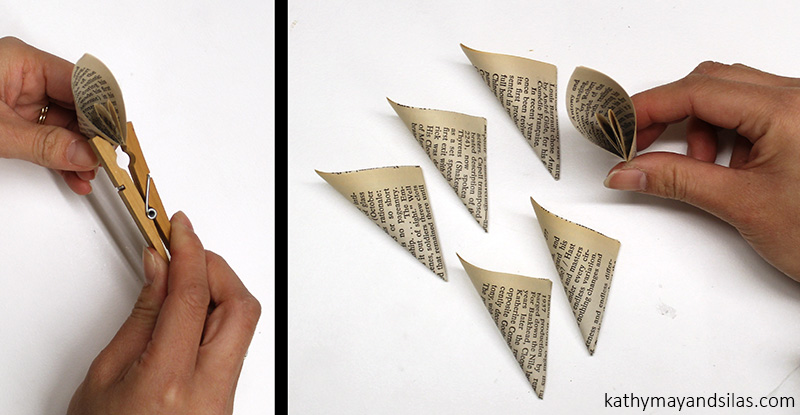
Congratulations: This is one petal! Repeat the above process so that you have around five to seven petals. Then, wait for Part 2 of this series, when we will finish our paper flower!
Until next time,
Kathy May and Silas
VISIT ALL THE POSTS IN OUR “PAPER FLOWERS” HOW-TO SERIES!
Paper Flowers: Introduction
Paper Flowers: Part 1 – Make the Petals
Paper Flowers: Part 2 – Coming soon….!

Great stuff …… we will wait until Part 2 is published before attempting.
Just wondering if part 2 is going to be published??
Hello AJ,
Thank you for your interest! We are definitely planning to continue this series – Part 2 is in the works! You can subscribe to our blog to get notified (the only emails are “new post notifications”)! Also, if you have creations please share them with us – we’d love to see!
Until next time,
Kathy May and Silas
Hi Kathy May, loving being into paper flowers right now for wall decor…. any idea on when you will publish the assembly? Your instructions are spot on easy to use so I’m anxiously waiting for the final assembly instructions.
Cheers – Jane from Toronto
Hello Jane, thank you for this reminder – I definitely keep meaning to! Your comment has inspired me to get back to this! 🙂